Here's a short vid on what the Archer's center torso and cockpit are looking like so far.
LINK here.
Tuesday, March 29, 2016
Recoverable. Moving forward.
It'll do.
So, I have a cleanup to do, but I can recover the center torso master part. I may rework the canopy as well, but we'll see. I actually bought two of them when I got them, so What I may do is just use this one while I paint up the master and assemble the model, then swap it out with a new one when I finally "finish" it.
The mold gives an ok pull. The sides are pretty crappy, but that's really something that can be fixed with some sandpaper. Again, it's not like I'm selling these, I just have it so I can duplicate the model if I want to. And, as luck would have it, all the detail parts, or main viewing parts of the torso, are just fine. The worst of it is actually on parts that'll be covered by the left and right torso missile launcher pods.
I could even probably clean this up to make a new mold, but why bother. I have what I need, and I the work involved to clean up the part is minimal enough to not warrant the expense of having to make another mold. (that stuff is expensive.) I'll just toss this in the box of other "almost good enough" parts to play with later, along with the molds.


That leaves the shoulder armor, the torso turret, and then painting and assembling.
I might actually get this done before Kerensky leaves the Inner Sphere...
Monday, March 28, 2016
Setback.
well Frak, that didn't go quite as planned.
I got the Archer's center torso completed and decided that, sure, I'll go ahead and make a quick mold of it so I can replicate it if I want to. I mean, I have 90% of the parts molded so why not? I formed up the framework and mixed the mold rubber and poured. Then stuff just went all caddywumpus. The master is hollow, and so it floated. Apparently it was big enough to separate the glue from the base of the mold and float the master in the pool of expensive goo. Lovely.
Fortunately, I am the creative sort. So, I just flipped the thing around, and put a board across the top of the mold shell, which effectively just held the part down in the pool. Basically it meant that the "base" was the top, not the bottom. Cool. I was all proud of myself for figuring that out.
This morning, after the stuff had cured, I cut out the master.
Crap.
First, apparently the mold rubber didn't 100% cure against the master, and I have no idea why. Either it was a layer of not-quite-mixed rubber against the master from when I poured it in the first place, or there was something on the surface layer of the master that caused it. I have no idea what that would be, as I've used the exact same stuff in all the other masters I've made.
Either way, my master is now covered with rubber goo and I have to figure out how to clean it. Remember, my "master" this time is the actual part I plan to use, complete with the cockpit. Added to that, when I look, there was a leak of rubber into the cockpit and there is a block of rubber in the front of the cockpit window. So, I get to crack off the canopy glass, clear out the rubber and HOPE that at least that stuff cured and will clean without leaving a mess on the canopy.
Yeah, that all really took the wind out of my sails on this particular project. And I was close too.
Going to just work at work today and try to put it out of my mind, and hope the cure finishes through today and I'll look at it tonight.
** Update: Well, the mold cured, but the residue on the master did not. And, as it is, the stuff where it did not cure is only on the large sides that were just primed Sintra. That's interesting. This stuff (moldstar 15-slow) doesn't cure if you use latex gloves or if the clay you're using has sulfer. So apparently, Sintra has whatever it is that inhibits cure. Yes, I used Sintra in my other masters but I also tended to have them almost all fully encased in bondo or cardstock. So that's something to remember.
I also got the cockpit popped and cleared. I attached a couple of shots of what I was dealing with.
Moving on. :)


Tuesday, March 22, 2016
Scaling.
One of the most controversial topics of conversation in the BattleTech universe is that of "scaling." This spawns from the question "just how big is a BattleMech anyway?" There is no real good answer and then the subject is complicated by the inconsistencies in canon drawings and descriptions, all accompanied by the fact that Battletech is an offshoot from Macross and that scaling just was "what looked good."
It's kinda like asking a StarWars geek, "So how many seconds/minutes/hours are in a parsec?"
Looking at the Mech miniatures for the tabletop game, even then things don't quite scale up. A spider standing next to an Atlas doesn't look like a 30 tonner vs a 100 tonner, the spider is too big in comparison. If you look at MWO, it's even worse, only in the opposite direction. I think about all we can do as modelers and collectors is to do things that make us happy and understand that when we share out our work, that there will be folk who have issues with it.
For me, as an engineer, what feels right is a volumetric comparison, and to do that, I need a base. I'm going to use the MWO Atlas as my metric of 100 tons and from that, whenever I build up something that's for me, use it as the basis. When I designed the Archer, I used my Timberwolf MkII and the Victor from FCY. The Timberwolf is a 90 Tonne 'Mech and the Victor is 80. I built up the Archer aiming to be just a bit shy on the mass than the Victor and I think I ended up getting it just about right.
In the end, I have the intent to display the 'Mechs against 28mm soldiers and also use them on the rare occasion we do 1/60 Battletech Games. With that as a base, my future plans will revolve around being able to fit 'Mech designs into those functions. Along with that, like every other model builder, I have to have a desire to work on that subject. Some folk like wwII hardware, some like space hardware, some like sci-fi.. As for me, I'm a Sci-fi Hardware kinda guy and there's something about the fluff of the Mechwarrior universe that is just fun. So, over time, I'll continue to build up the 'Mechs I like and have a desire to have adorning some display.
I really only went into all that to set up the conversation about the next one I am going to build up from scratch. I have two on the list that I want to build, both of which are primary scout 'Mechs I use in MWO: the Jenner 7-D and the Spider. Now, both of these 'Mechs are available via Thor in 3-d print, but sadly his scaling is true to the MWO world. That scaling is way off in my estimation for all the light 'Mechs. If an Atlas or King Crab scale out to 100 Tonnes, then the Spider as scaled in the game can't be more than about 13. So, if I want one, I'll need to build it and scale it up a bit.
Essentially, a Spider will be about half the volume of the Archer. Considering the size of the spindly legs and arms, which the Archer has beefed up a bit, the Spider will have to stand close to shoulder-height to the Archer. The thing is, the 'Mech has to have the internal structure and volume for the cockpit/pilot, the weapons, the reactor, etc.. etc. If I build it around the cockpit, then that will, I believe, help me with the scaling as well.
I'll have to play with drawings a bit, just to get a feel for the size and layout of the build, but going from one extreme to the other is tricksy.
I like both 'Mechs, but I find myself using the Spider a bit more at the moment, since my unit pretty much imploded. Running with PUGS, you need to be supportive, but also able to do a good job of fending for yourself. I find the ECM Spider to have the right combination of speed and survivability for PUG groups. The J 7-D is great for a swarm, but you really don't want to be running alone.
Thursday, March 17, 2016
Project R: Starting to look like an Archer.
I've made the progress on getting the arms prepped, leaving only the shoulder "pauldron" armor plates yet to go. The medium laser emitters are ready and that mold is working ok. With that said, I really kinda like the way some of the builds look in MWO, specifically putting SRM6's on the arms. I may make a pair of arms that have that configuration as well.
Or, maybe I'll just make a second Archer. Someday. Maybe.
With that said, I started to fiddle with the cockpit and I became less and less enamored of the pilot. It's ok, it's a typical 28mm mini, a bit of detail here and there but somewhat blocky and just kinda "meh." So, I ended up just ordering a detailed Yak-22 pilot and Martin-Baker ejection seat to go in there. I can add a little bit of piping and a Neurohelmet to finish off that detail and from there, complete the instrumentation and detail of the cockpit.

I also am just not happy with the canopy. Too big, too bulky. I also am not that great at piecing together clear parts, and don't have a vacc former. (A technology that might be worth investigating at some point.) So, I'm going to try something a bit different, I ordered a canopy for a De Havilland Mosquito.. it's got that short, fat and low look that should work on the front of the Archer. I'll have to see if I can finagle it and get it to work. If not, then I'll have to try something else. Mechs like the Loki are easier, a bubble canopy works fine. Or the Hatchetman, Victor or Timberwolf, I can form thin clear across the inside of the superstructure. I'll be doing the same thing on Project D. So, let's see how we do.
The last decision to make is the paint scheme. I'm torn as I have a couple of options. First, I can go with my own unit's grey-and-red scheme. I like the look of it and I know how to weather the grey well enough. I also would like to do a nice broken-line urban camo with variable levels of grey. The other option is to make *the* Mech that I've read about so much.. the Blue and Gold Archer. My only hesitation is that I'd have to figure out how to highlight and weather it, and that I'll likely have to learn how to use this airbrush thing, as there's no good rattle-can blues to use.
Back to.. maybe I'll make a second one. Maybe.
I've gotten the shield plates on the hip joint and I think I'll put similar on the foot/ankle as the MWO incarnation has them and I like the look. Anyway, here she is so far.

 .
.
Monday, March 14, 2016
Project R, and Project ADD:
Slow progress, but there is some.
I've got project ADD, and the multiple hobbies are all
crossing over on the workbench. With that said, I've gotten more progress
on Project R. The forearms are done and molded, the casts pulled just
fine as did the medium laser housings. Next up for them is to do the
shoulder armor plate and make up the fingers for the hands. At some
point, possibly soon, possibly not, I'd like to do a Large Laser housing for
the arm as well. I suspect that's what I'll be carrying on the build in
MWO as those extra few points of damage tend to be just what you need to cut
the legs out from under the harassing lights that come up on you.
I'm about to run out of mold rubber and casting plastic
too. And I'm on the fence about that stuff too. I really like the
"instant gratification" of the fast set mold rubber and plastic, but
I do have the usual issues with small bubbles. The Moldstar 16 stuff is
pretty good about not making surface anomalies though. The thing is, I
understand that I can't really pressure cast if there are bubbles in the
matrix, and I DO get bubbles or voids on some of the corners and edges. I
believe that using the Smooth-cast 310, which sets up in 30 minutes would give
the opportunity for bubbles to move out, but on the flip side, I can't
slush-cast with that, it takes too long to set up.
Decisions decisions.
Speaking of decisions, the engineer in me isn't slowing
down. There are a couple of other 'Mechs that have been wanting to
do. Now, Thor has done both of them: the Jenner and the Spider. The
thing is, both of the ones he's done have been scaled to the MWO sizing, and I
find that they're way too small in my estimation. The spider comes up
barely to the Atlas's hip. For a 30 tonne mech, it should volume out at
about a third of the Atlas. The spider is small, but not *that*
small. Similarly for the Jenner. The bubble doesn't have room for a
cockpit/pilot. I think for both of these, I need to do some drawings,
starting with the cockpits and building outward. These are 'Mechs I
use in team play. I love my Warhammer and Archer, but primarily, I am a
scout driver.
On top of this, I now also have a high-priority deliverable
to do. Once I get the Archer completed, I need to do some fabrication in
the 'MechLab and see about building out the Prometheus. I have to shred
the torso of the DireWolf I got from FCY to put in a cockpit, and then
fabricate up the specific Arms and missile launchers specific to Victor
Steiner-Davion's 'Mech. On the bright side, this will work out as a
trade and AngryHippy will paint up my bolt-action Soviet Infantry. Good
trade on my part. :)
So, to recap:
Projects underway:
Project R: Archer 70%
Project DW: Dire Wolf Prometheus 20%Project A-DDC: Atlas: 10% (Gauss Rifle fabricated)
Project T: Trebuchet 25%
Project S: Spider 0% (conceptualization drawings beginning)
Project J: Jenner 0% (conceptualization drawings beginning)
Project L: Loki 0% ('Mech acquired.)
Project MDIV: MadDog IV: 0% ('Mech Acquired)
Project W: Warhammer 20% (Mech acquired, basic assembly begun, electronics conceptualization beginning)
Project o: Owens 0% ('Mech purchase order sent)
Oh.. and FCY is teasing another MUST-have Mech.
ssssiiiigggghhhh.
And these are just the 1/60 scale Battlemech projects.
It doesn't touch the list of SCA armor builds, Mandalorian props/armor,
steampunk armor, Bolt Action army work, or scenery builds.
Project ADD much?
Sunday, March 6, 2016
More progress done on the Archer.
More progress done on the Archer.
I scavenged a couple of leg joint pieces from a kit I had lying around. It's got the articulation I would like and also has just the right distance between shoulder joint and elbow pivot, per the drawings I'm using. It does not have shoulder-lift articulation pieces, but I can modify that with either a ball joint for the socket or just setting it in the angle that I want. The MWO mechs do not have that vertical lift, so it would not be inappropriate to do the same with this, but as I've mentioned in previous builds, I like the dynamic poses. So, I'm not sure yet. I also need to do the upper arm shield, but that shouldn't be too difficult, as it's mostly armor plating covering the shoulder joint.


With that said, I then got cracked in on the lower arm. The main housing is done and prepped, now I have to add the detail plates and the medium laser housing before I pour the mold. Of course, that leaves me in a quandary; do I attach the ML housing to the arm, or leave the arm as-is, and cast the ML separately, leaving the possibility to add a large-laser or small-laser housing? Considering, I'm making this for me and not as a kit, it makes sense to just put it all in at once. Besides, I'm not molding the upper arm piece, at least not at the moment. If I were to, I'd need to pick up another of the kits from which I scavenged them. But maybe there's this little piece of me that would like the options. I'll probably do it separately, just because.


I also need to create the hand pieces. Those will come. I'm half tempted to go to shapeways or order a gundam hand and just fiddle with the parts, but then, I could probably do the fist easily enough with just 3mm sintra pieces. The one thing I'm struggling with a bit is whether or not to bisect the hand off the upper arm, and then cast the whole thing that way, but I'd rather not. I think I'd prefer to have a way to set the hand in as an inset plug to the armor of the lower arm.
Finally, detail. See, this is where I still am not familiar enough to know what to do. I want to scribe in panel line detail, but I always seem to get that either too fat, too thin, or all wibbly-wobbly. I will try a bit on some test pieces, but perhaps with a good knife and patient hands, I can get something positive. I've tried a dremel, but it goes all over the place.
I scavenged a couple of leg joint pieces from a kit I had lying around. It's got the articulation I would like and also has just the right distance between shoulder joint and elbow pivot, per the drawings I'm using. It does not have shoulder-lift articulation pieces, but I can modify that with either a ball joint for the socket or just setting it in the angle that I want. The MWO mechs do not have that vertical lift, so it would not be inappropriate to do the same with this, but as I've mentioned in previous builds, I like the dynamic poses. So, I'm not sure yet. I also need to do the upper arm shield, but that shouldn't be too difficult, as it's mostly armor plating covering the shoulder joint.

With that said, I then got cracked in on the lower arm. The main housing is done and prepped, now I have to add the detail plates and the medium laser housing before I pour the mold. Of course, that leaves me in a quandary; do I attach the ML housing to the arm, or leave the arm as-is, and cast the ML separately, leaving the possibility to add a large-laser or small-laser housing? Considering, I'm making this for me and not as a kit, it makes sense to just put it all in at once. Besides, I'm not molding the upper arm piece, at least not at the moment. If I were to, I'd need to pick up another of the kits from which I scavenged them. But maybe there's this little piece of me that would like the options. I'll probably do it separately, just because.


I also need to create the hand pieces. Those will come. I'm half tempted to go to shapeways or order a gundam hand and just fiddle with the parts, but then, I could probably do the fist easily enough with just 3mm sintra pieces. The one thing I'm struggling with a bit is whether or not to bisect the hand off the upper arm, and then cast the whole thing that way, but I'd rather not. I think I'd prefer to have a way to set the hand in as an inset plug to the armor of the lower arm.
Finally, detail. See, this is where I still am not familiar enough to know what to do. I want to scribe in panel line detail, but I always seem to get that either too fat, too thin, or all wibbly-wobbly. I will try a bit on some test pieces, but perhaps with a good knife and patient hands, I can get something positive. I've tried a dremel, but it goes all over the place.
Gauss Rifle Anyone?
I know, I'm supposed to be focused on the Archer, but I can't help fiddling with the Atlas. I went ahead and made a Gauss Rifle barrel to put on the underslung cannon housing for the torso. I'll pull a mold of this one just because making it was a pain and I may want a Gauss for other builds at some point.


Wednesday, March 2, 2016
On Quality, Value and insulting Artisans.
I did a little thinking about "items" and value. As I've said previously, I have a "maker" streak, in that I make stuff. To anyone following this blog, that's clearly obvious. Usually, I make stuff for me. When I was 8, I wanted a Space 1999 stungun. They didn't have one in Ames, so I built one out of Lego and I was happy. Later, as I grew, I started making models and I found that my preferences ran toward those subjects that are somewhat more rare. Space 1999 Eagles, Star trek Romulans, etc.
While this particular post is focused on models, it applies to just about any "garage industry manufacture." When I say that, I mean one-man operations or collaborations of small groups of people who turn out subjects that they're passionate about. I will preface this with the statement that I do NOT produce models. I buy kits, and I build them, either from the kit or from scratch. Typically I build for me but on the rare occasion, like with the Hatchetman, I build for a friend. I DO have a side-business in leather work, and I see similar things that "community."
When it comes to computing the "Value" of a subject (I'll use the words subject and kit interchangeably), I figure there are three main factors: 1) Actual manufacturing cost 2) Quality of the product relative to similar subjects and 3) the ratio of supply to demand.
The first factor is also the one that I see so many folks argue about when they complain about kits. "But it's only XX euro worth of Resin" or some such. Cost of manufacture isn't just the cost of the resin that gets poured into molds and a fraction of the cost of the molds themselves and the casting equipment. It's the time involved in making masters, the time involved in making quality molds and the time involved in making quality casts. Time. Professional time. That's not cheap. Take a look on evilBay for 40k painted models. Let's say we look at a Knight Titan model; you'll find KT kits for about $120, and painted/finished KT's for about $350. Why? I mean, there's only about $10 worth of painting on those models? Because it's the professional application of those paints to make the end result. Making a model kit involves not only the professional application of making skills to build up a model, but also engineering the thing so it can be cast in parts and duplicated. Whether this is 3-d rendering on the computer for automated creation process or the manual process I use to work clay, plastic, and resin, there are very specific skills involved in this and the final kit is the end result of that effort, just as the painted 40K knight Titan is the end result of the effort of the painter.
In a large manufacturing environment, that skill is compensated by a wage, either hourly or per-project base. That cost is then factored in to the rest of the costs of manufacture, etc. when it comes to the final kit price. Again using Knight Titans as an example, those kits run, on average $120 up to $170. The Warhound Titan, which is a comparable kit to say, the FCY Atlas Battlemech, runs an average of $500 for body and legs, with another $150 for the specific arm weapons. And these are costs coming out of a major manufacturing corporation. On the garage industry scale, manufacturing costs are much higher per unit. Typically, where the garage manufacturer takes a hit, it's on the compensation for the artistic process part.
The second factor is quality. I will have a video of quality comparisons of similar kit subjects at some point soon. Again using evilBay as an example, you can find Knight Titan model kits that run about 40% cheaper than the going rate coming out of china. Those kits are clearly re-casts of original models and as such they suffer from the typical issues for second-generation products. The details tend to be softer, the parts tend to be sized a bit smaller (suffering from shrink from poor plastic) and so on. For some people, those recast parts are close enough that the cost savings is worth that slight suffer of detail. For others, it's not. As another example, I have some moderate skill as a modeler, and while I'm improving, my skill is not yet comparable to some of the masters of the industry. If I put my Hatchetman next to Tim F's Victor or the Tim/Scott collaboration for the Atlas, my work clearly is inferior. So if I were to put out a kit and Tim were to release a kit from the same subject, I would reasonably expect that the public would be unwilling to pay as much for mine as they would for Tim's. Speaking of Tim's work, I have done unboxings of his work and the product he releases ranks right up there with the best I've ever seen. For comparisons, I have a Company B Gaz Jeep, a Hunk-o-Junk Serenity kit from several years ago, a BadAzz BSG 1/32 scale Raptor, the ArmorCast Timberwolf(MadCat) and some 3-d printed Battlemechs. Of all these kits, Tim's work is comparable with the best of them. The 3-d stuff is ok, but to make them good-display quality requires a very great deal of effort and work. As a modeler, I don't mind, but it is a definite quality difference. The Company B stuff is arguably the worst of the lot.
The Company B Gaz Jeep is a good representative of the quality of Company B products. They're "ok" but not "awesome." This particular one is about $30 for a 1.5" long mixed media kit of a Soviet jeep for the game "Bolt Action."The model itself is "meh." The detail is ok, but the execution is poor. The example I got has mediocre detail on the metal parts and the body of the jeep was warped, had bubbles and casting anomalies. Even the overall master was "meh" in that the design of the model was only ok. The detail for the side or front was mediocre at best. So how is it that they can charge $30 for this? That segues into the third factor.
Which is a segue into the third factor: the ratio of Supply to Demand. BA is a growing interest and has a fairly high volume of sales and players among the historical gaming community. The Gamer demand is much different than say the Historical model-builder community. That community demands absolute accuracy wherever possible and they pay a premium for it. They think nothing of paying $20 for a plate of Photo Etch parts to hyperdetail a gun breech that may or may not even be seen. The gamer community is a bit more frugal as the intent is more "hands on play" than "gorgeous display model," but even so, $30 for this particular kit is.. high. So. How do they get away with it? Simple: it's the only one out there. If you play Bolt Action and you want to include the Jeep in your army, there is only one option for the army list, the Gaz, and only one source for that kit: company B. So, it's either spend $30 and get a "meh" kit, don't take the Jeep, Proxy a willie from the American/british, or build one yourself. Most people don't have the skills to do it themselves, don't want to Proxy (or are forbidden by their gamer group) and are happy enough with the representation Company B puts out, so they're willing to drop $30 on it.
The demand is high enough for specific pieces that Company B can turn out mediocre quality subjects and charge a decent pricepoint for them. Now, let's look at something like the Warhound Titan from Forgeworld. Now we're talking about a fairly high price point, in the realm of $500 - $800 for a full, unfinished kit that stands about 14" tall. It's a big kit, it's pretty well detailed and is a nice looking model. Will I pay $600 for one? No. While I like the 40k game, and I like the Titans, my group of friends do not play games where we'd use them and it is a very large price tag for somethat would, in my world, amount to a katchkie. To other people, they are worth it.
This is where value becomes subjective. Many years ago, I had an opportunity to get my hands on an ArmorCast version of the BattleTech Atlas. At the time, I didn't have the available funds, or rather, I had other priorities for them, and didn't acquire one. Now, those kits do still exist, but finding one that is available is extremely rare and when you do, it's not going to be for the same cost as ArmorCast was selling them for. I have always regretting missing out on that offering. I was fortunate enough a few years ago to get my hands on one of ArmorCast's Timberwolf(MadCat) and counted myself lucky. When MWO came along, I started actually scratch building an Atlas in that style, as I found that to be an even more attractive aesthetic. Along comes Scott over at Messydesk. I was watching his build and duplicating much of the techniques he seemed to be using. Then came his announcement that FCY was going to kit that out and release it. I stopped working on my own and decided to get in on the pre-order of that kit. There was a run of about 20, and I got my kit. I've done an unboxing of it and I was not disappointed in the least. The cost Tim F is asking is the same that ArmorCast was asking for theirs, and this Kit has, in my opinion, a higher degree of quality and detail.
Granted, I am a big fan of Battletech. The Atlas, the Timberwolf, the Warhammer, the Archer.. all these things have a high-value to me. These are niche subjects that some people simply do not value at all, and the model kit becomes less about the subject and more about "how can you charge that?" With that said, I could put my Hunk-o-Junk Serenity kit up on evilBay, or out on the Forums, and ask $500 or more for this and there would be a long list of "Take my money" messages. Why? The kit is very rare, of extremely high quality and is of a high-demand subject.
So why the difference between FCy's Mech and the Serenity? Simple: perceived value. The Serenity is a high-demand subject. There are no model kits available to be purchased. It's as close to a one-of-a-kind that you can get. FCY's kit is being thought of as "hey, all you have to do is pour resin, so it should be cheap." That's the perception. Sadly, that perception, and the arrogance of the people who think that way is why these things *are* so very rare. People like Tim see his work criticized and de-valued, and are not motivated in the least to continue to produce these high-quality, very rare kits. I'm very much of a mind to pre-order 3 or 4 for his next run, which is also likely to be the last. The molds last usually only 2 or 3 runs and then they'd need to be re-done, which is cost prohibitive, especially in light of the other factors. And then, 3-5 years from now, sell them at either a Con or on evilBay for over $500 a piece. There will be a lot of people that will have a "wow that's too expensive" reaction. However, I suspect I will find 3 people who value these the same way I do. The only thing that holds me back from that is the fact that I remember what it was like when I missed out on the ArmorCast Atlas, and don't want to take one of these things away from someone who DOES value them the same as I do.
So, there are a lot of words up there, and even with all that, I still only scratched the surface of the subject. The one thing I really do want to express, is just how insulting it is to an artisan when a person devalues their work and says "but it's only paint on a canvas," or "It's just a picture" or "It's only $50 of resin" or "I could make that..". Folks, please think. Before you open your mouth and insult the guy who is making something, understand that value is subjective. In the case of FCY's Atlas kit, there are according to my estimation, only 22 of those Kits in the world including the master and the prototype. There may, emphasis on "may," be another run leaving a total of only 30-40 of them. If you think you can make one, rock right on and please share. I'll happily oooh and ahhh over the work. So will Tim. He was a great source of encouragement as I made my Hatchetman. If you just aren't willing to pay the asking price? Please don't insult the artist. Just move on. I can guarantee you that the portrait is more than "just a picture" that the photographer took, or that live performance is much more than just music by the musician, and that model kit is way more than "just $50 of resin." It may not be *worth* the asking price to you, but that doesn't mean it's not worth it at all.
Tuesday, March 1, 2016
Project R: pt 6
Update on the Archer.
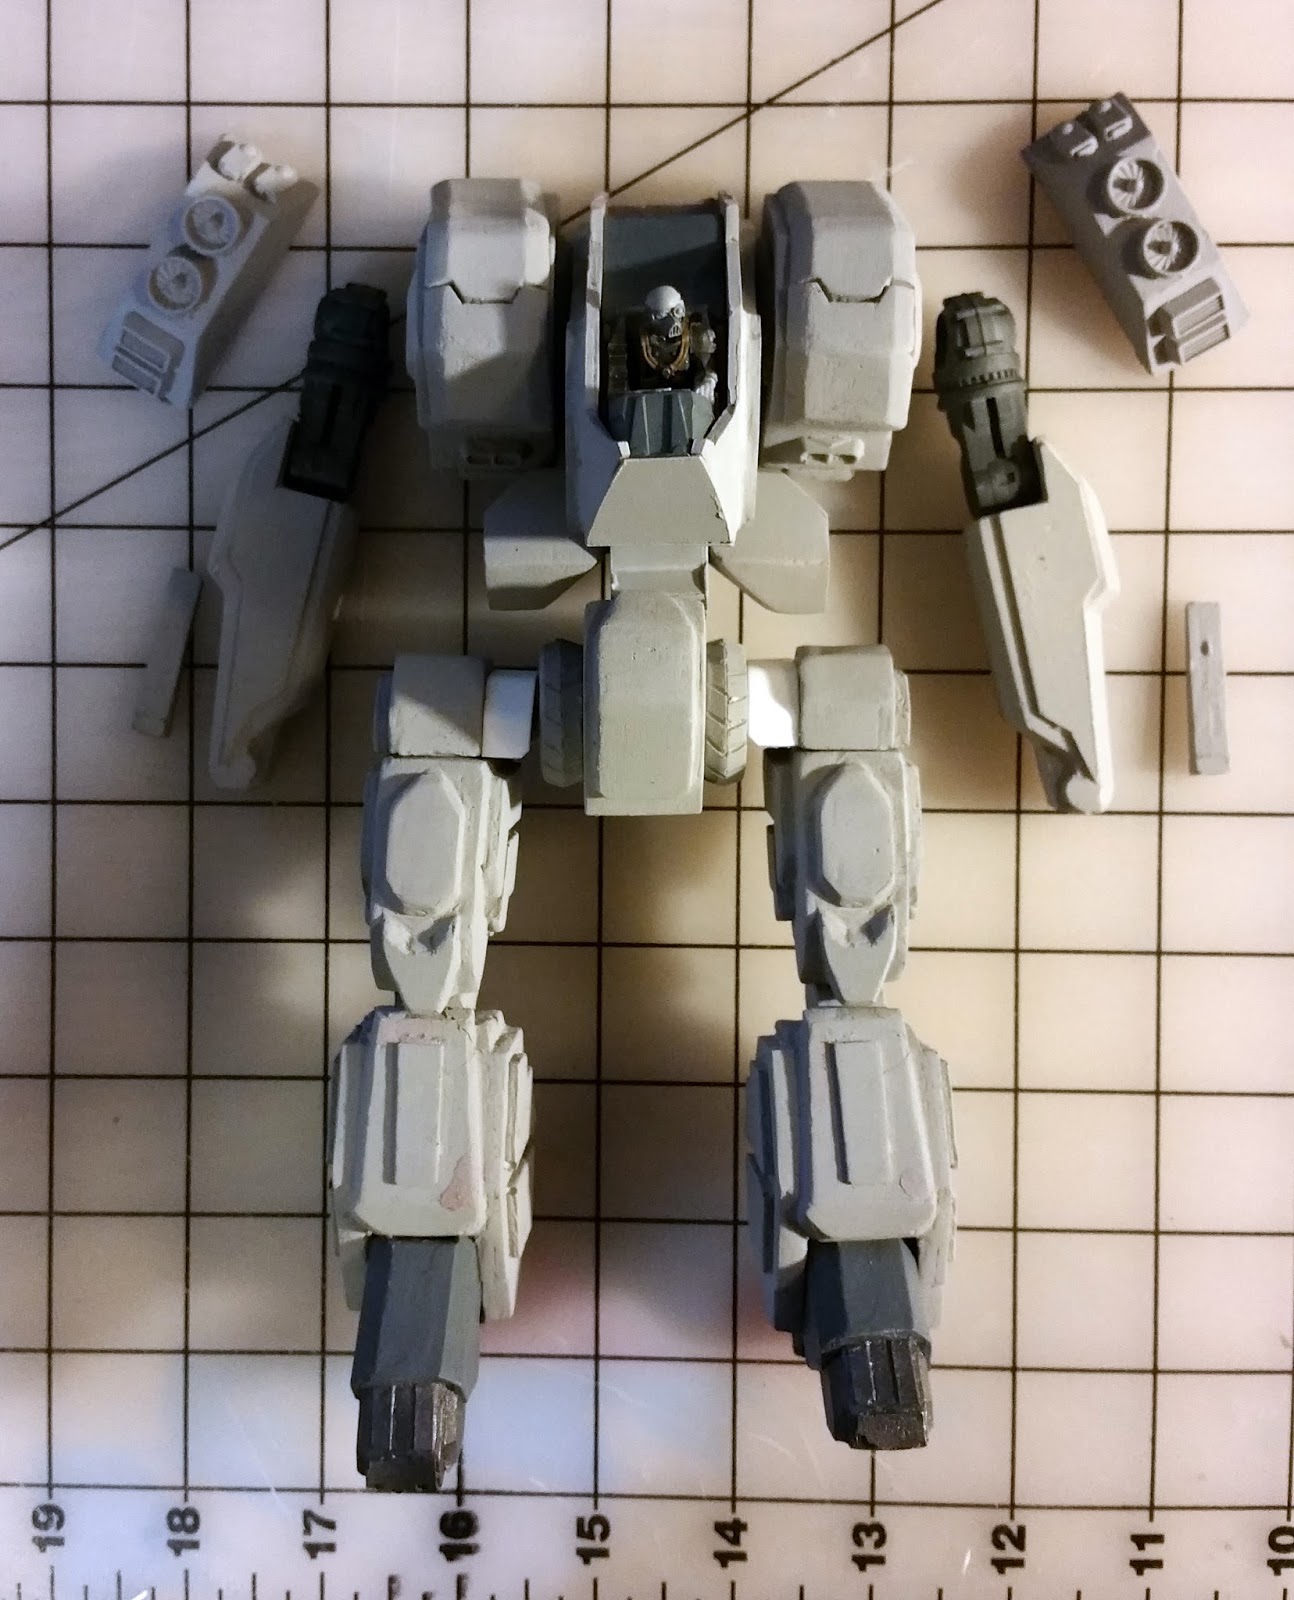
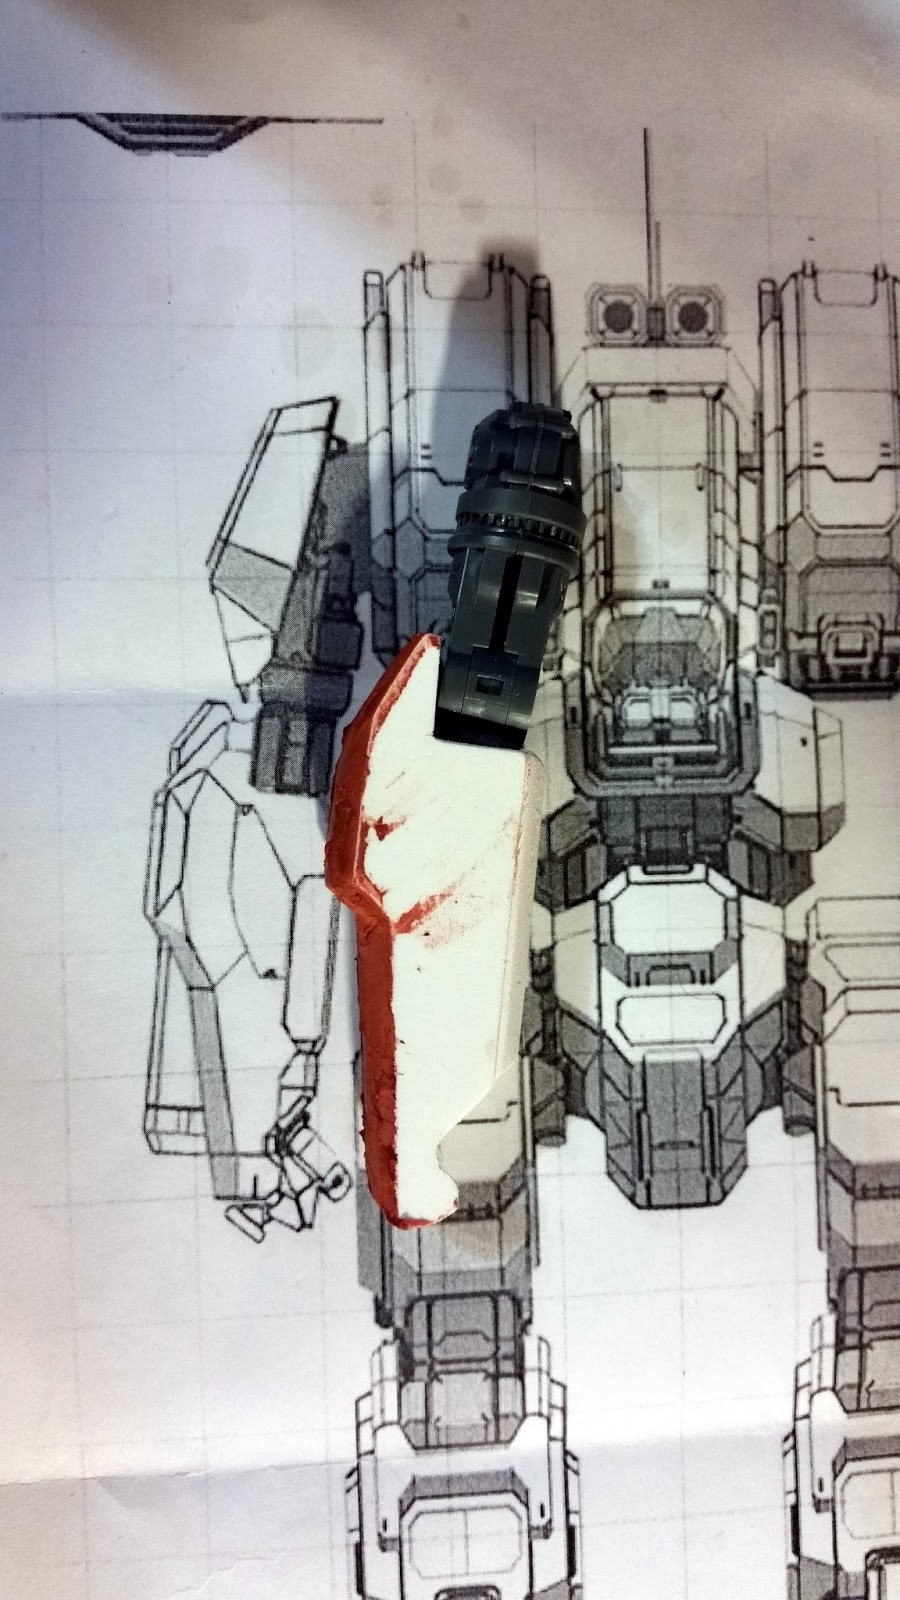
I got some work done with the lower half and have some minor progress for the center torso to show.
The CT pics are below. I am still on the fence over the cockpit canopy. I like it, and yet, I don't. I like the plate-glass look to it, where it follows angles rather than being a smooth curve. To the left, it may just be too big. I dunno. I think I'll order a 1/48 F-16 or F-4 canopy and see how they work. Or, I could just try to do a heat pull of thin clear plastic and try that. If I had a vac-former, that'd help, but I don't so I have to be creative.
Also, I added a quick "this is where I am so far" video.
Follow this link to see it.


Subscribe to:
Posts (Atom)