So, what's next?
With the TimberWolf Mk II just waiting for a few finishing touches, the Manufactorum is ready to be retooled for a new project. I have a couple of options, and just need to make a decision.
1) Resume Project T-1. I started out to work on a Prime-variant Timberwolf, when the Mk-II came across my desk. I could return to this one and finish, although it's much more like "getting started" as I really hadn't gotten very far.
2) Project W. The iconic Mechwarrior Battlemech, now unseen, and "the" mech along with the Phoenix Hawk and Jenner that I ran with almost exclusively on the tabletop game.
3) Try my hand at building from scratch. This one is the biggest challenge. While both the above will require heavy custom work to make them what I envision, including custom cockpits and detailing, this is the project that is "all new." Then again, this is also the project that would push my limits more and make me learn. There are some models that come to mind immediately:
Atlas. I mean..seriously. The ultimate Steiner scout mech, and the "other" iconic Battlemech that just says "badness." It's big, it's recognizable and it's a menace to the badguys on the field. I think Armorcast did one at one point, but I never did see it if they did.
Jenner. This one is a personal favorite, just because it is my current favorite scout Mech. Jenner-7F, Twin SSRM and 4 ML, along with 150+ kph of pure annoyance.
Phoenix Hawk. Again, a personal favorite. One of those "are you frakking kidding me" moments during the first table-top campaign we ever ran. Took out a stalker at long range with a bloody lucky headshot. Yeah, I know, it's another of the unseen, but I still like it.
Wolfhound. If you grok the lore, it makes sense. : )
Decisions to make, things to do.
Tuesday, June 24, 2014
Sunday, June 15, 2014
Mostly done.
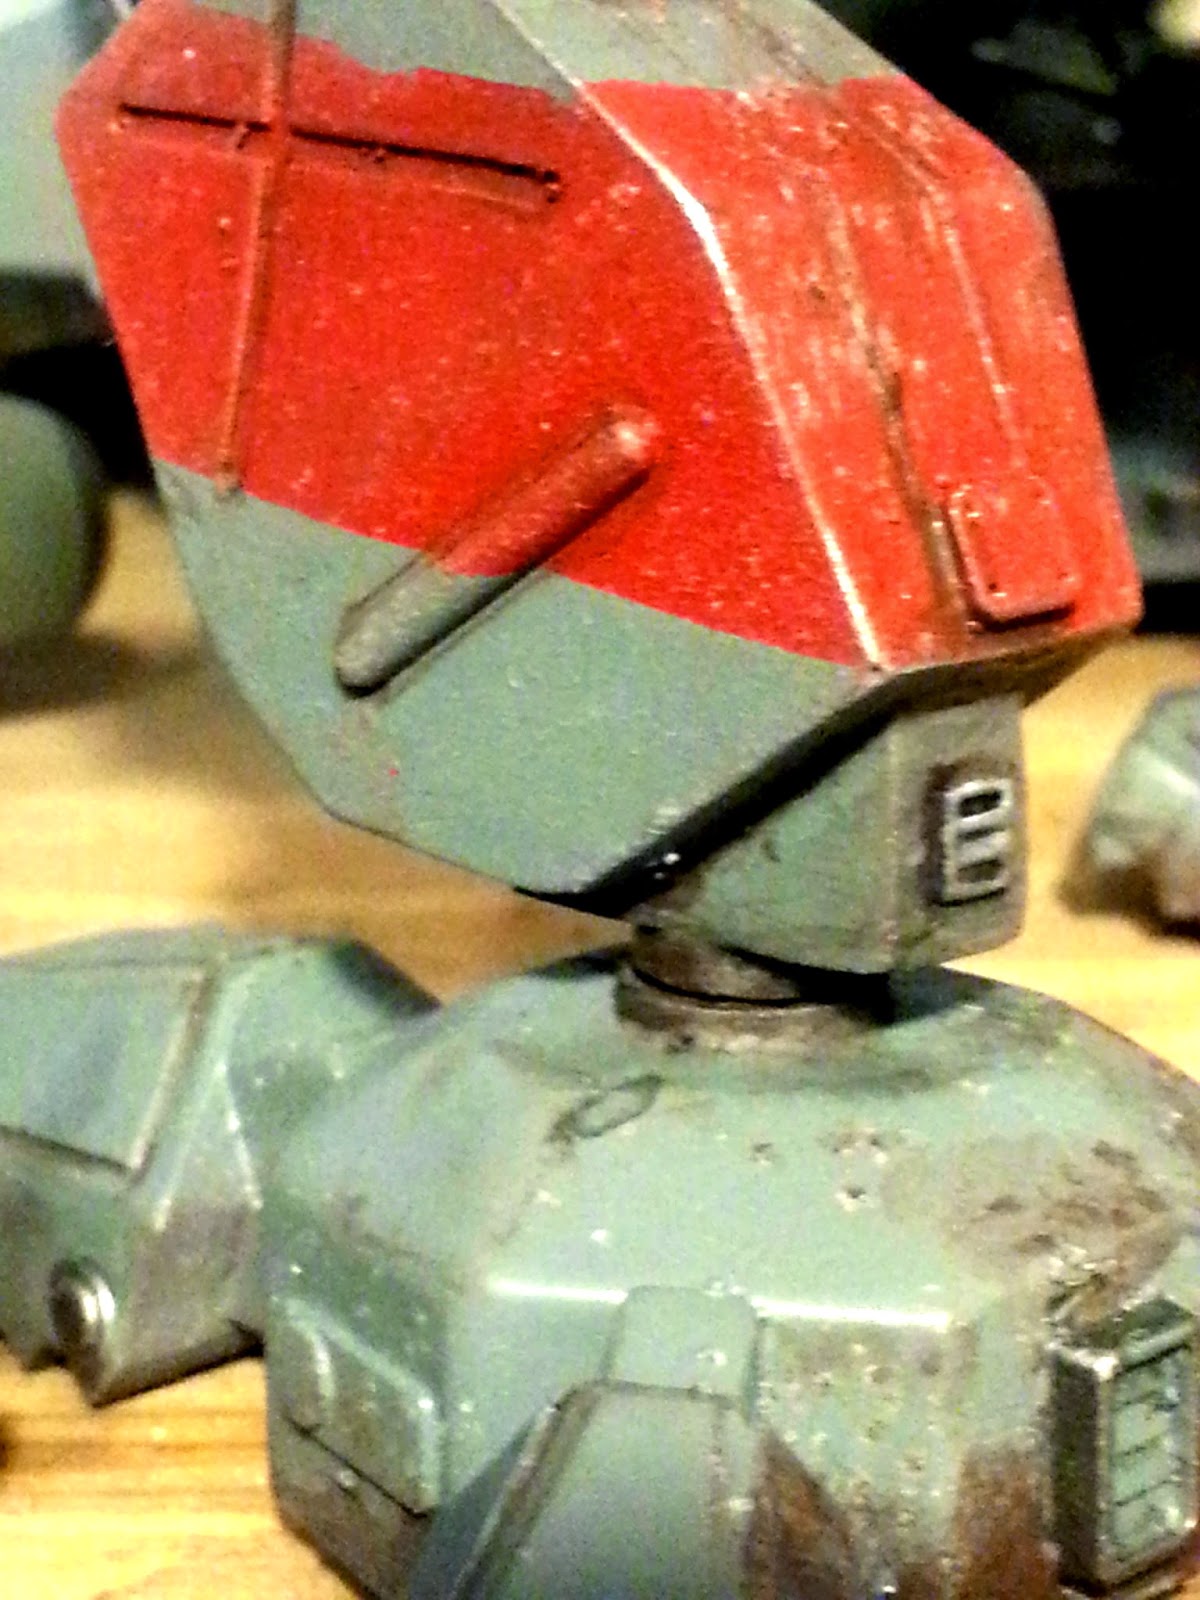
So, here we are, pretty much finished with the TimberWolf MkII. I had an absolute blast working on this one and am almost content with the outcome. I am still waiting for the decals to be completed and once done, applied and set.. this project will be complete and I can move on to the next.
I went with my gray and maroon colorscheme, and that matches the scheme that I envision for the Wolves-in-Exile. It'll also go well with my 28mm army scheme too. Call that a win. The cockpit came out well, perhaps not quite as well as I had hoped, but not too bad considering. The next one I do will have some lessons learned. The weathering and scarring is intentional. I wanted her to have that gritty, menacing look of a veteran from campaigns. I used the same scoring techniques as I did when I did Starbuck's Viper MkII, and have been happy with the result. This was also the first time I'd used the salt technique for rust effects and that *really* came out well. It gave the paint a 3-d look to it where the corrosion had begun to wear away under the paint.. I imagine the techs will have quite the job ahead of them replacing panels and the armor plates.
So, enough babbling. On with the photos:
Monday, June 9, 2014
The why of it all.
Why do I do what I do? You know, that is something that can be asked of many aspects of my existence. Of course, once asked, I always find myself stopping and looking at myself and the "things that I do" and shaking my head at the sheer eclecticness that is "Mal."
Side note, yes, I DO self-identify much more to "Malcolm" than to Preston, and so when I reference myself it is far more often some version of Mal than anything else. And yes, I hear Newt's voice in my head among the rest of the chorus too. So there.
Anyway, back to the original question: why do I do what I do? In this context, why do I build models? The short version is that the ten-year-old engineer wants time in the sun. I love creating and I learned to build the things I envisioned in my mind when I was barely 5. One of my father's quotes that has always stuck with me very eloquently sums up this aspect of me; even though it wasn't complimentary. He said, when I showed off a particularly intricate and complex diorama of models when I was about 11, "You'd build entire worlds out of paper and cardboard. Too bad you can't make something real."
He was right, I would. Unfortunately for a ten-year-old in the mid 70's..paper and cardboard was what I had. Clay was, at best, play-doh and rubber mold stuff was nowhere to be found. So I built plastic models and modified and kitbashed and built whole worlds to my heart's content.
What I was doing then is what I am doing now: Telling stories. Another aspect of Mal is the writer, and my modeling is the "show" part to go with the "tell." I get to see the images in my mind come to life under my hands. I get to touch those things that have captivated my imagination for all these years.
It's like this with the Timberwolf. The 'Mechs of the inner sphere have slugged it out for centuries. Then, on an obscure skirmish field in the Periphery, the world exploded in fire and destruction. Striding out of the rising smoke, laying waste to all around it, the Timberwolf came into view.
That moment, that image that I first read nearly a quarter of a century ago, still resounds in my psyche. That moment and a hundred other such moments from a thousand different worlds and realities, all twist and turn inside my mind. With my hands, I give them form, shape, reality.
For a time, I can touch my imagination.
That is why I do what I do.
Ok..back to work....

Friday, June 6, 2014
TimberWolf II, pt. 2.
Keepin' on keepin' on.
The work on the Timberwolf II continues apace. Sadly, work-what-pays-the-bills has been more than a little demanding and I've only been able to dedicate an hour or so a night to the work-that-is-fun. With the customization, that doesn't allow for a lot of progress. Do a bit of greenstuff..then wait for it to cure. Do a bit of Greenstuff..then wait for it to cure. However, I think I am finally to the point where I can basecoat the upper half of the mech.
It took me a while to come up with the paint scheme, and in the end, I decided to go with the color combos I have for the Inquisition. It's a dark gray base with a single blood-maroon stripe. For me, she's going to fulfill a couple of desires. She can do a stand-in as an Imperial Knight or possibly a Warhound Titan on those rare opportunities for me to field such things in the 40K world. When not doing that, she will make a nice centerpiece for a "coming back from a very long campaign" display. Battered, bruised, the hard touch of wear and weather all around, giving her a gritty surviving veteran look.
The Lower half, from the hips on down, is about finished. I decided on a little bit of a wide stance with a slightly downward canted angle for the hip. I wanted to give it a somewhat dynamic look, while it could also not be out of place if, at sometime in the future, I wanted to develop a "mech bay" diorama display for her. Depending on the angle of the torso, it can give the impression of a 'Mech at rest or one about to cut loose. I like that. I pinned the hips and knees, but the weight of the model was too much to be able to rely solely on friction to stay in place. The hip joint to the torso is also pinned and it should be able to stay movable and easily disassembled for transport. (note to self.. I might want to look into a Helmet case for her to as a display...)
I don't think I'm happy with the battery case, but the jury is still out on that.
Lrms. Lrrrrrrmmmmzzzz... gotta haz llllrrrrmmmmzzzz. Yes, it sounds just like it does in your head. I saw Scott over at Messy Desk did a nice LRM20 conversion to the pods and now I'm all kinds of tempted to do that. Of course, there is a piece of me that wants to pop open all those tubes. Then again, there's a piece of me that is an idiot too. Lrm10's on a 90 tonner, I dunno. Ya know, I might just wait until June 16 and see what the Clannerz actually end up fielding. I know I always preferred the 15's on my tabletop Timberwolf, but the 10's might enable a bit bigger engine or more dakka. Why, yes, I *am* using MWO to help me make decisions, why do you ask? :P Decisions decisions.
Yeah, no pics today. Later.
Tuesday, June 3, 2014
Slight sidestep and more work:
so, I've moved the Timberwolf to a side burner for now, as the Manufactorum has had a delivery of parts for a Timberwolf MkII from FCY. I managed to figure out the whole adding images thing..so some are attached below. At any rate, progress is happening.
The first thing I did was get the cockpit built and ready to install. Anyone who knows me knows that I have this thing for cockpits. I really like to look at a ride, whether it's a Viper, a figher, a 'Mech, a tank..whatever, and see that there is a cockpit, controls and possibly pilot. I think that all goes back to the first large-scale plane I built when I was younger, a 1/48 F-14. There's something about it that adds to the realism and believeability of the models. In this case, the MkII cockpit has forward windows rather than a canopy, so the detail can be a bit less than would be for that F-14, but still want it to look good.
I ended up just building a tub, and using photo-etched instrument panels. The pilot is a Catachan guardsman with a Cadian's head/helmet. Clanner helmets are smaller and more fitted than the I.S. Neurohelmets so that works for me. Heat, however, is still heat, and so the bare-armed and vest-wearing Catachan jungle fighter felt right for me. I put him in a fairly dynamic pose and then placed all the final details. Finally, lights. I really didn't have the materials to light up the instrument panels, but the way the cockpit is shaped and formed, the majority of everything is going to be in shadow and darkness. So, I decided that, hey, in for a penny in for a pound; let's light it up.
I mounted a pair of small yellow lights up in the uppper back corners of the cockpit tub, that will shine down on main part of the cockpit. They'll be powered by 3 small watch batteries. I needed to have a space where I could swap them out when they ran down, so that factored in to the what/where/how of placing them. That also cascaded a few more decisions on how to mount the hip to the body. I needed something I could remove, but would also be stable. I thought about magnetizing it, but that was just a bit too insecure for me. So, I just pinned it with some brass bar stock I have. Friction will hold it together just fine and also enable torso/hip twist. I then hollowed out the space for the battery compartment, and it'll sit just above the front part of the hip piece. The position of the space, combined with the hip in close proximity will hide the opening quite well, once everything is painted.
Lit cockpit from the outside

Cockpit from the outside..unlit


I had a small slider switch on hand, and there is a very convenient space on the main body, behind the shoulder mount where it fit nicely. I hollowed out a hole for it to mount and drilled a channel for the wires to go. A little greenstuff to seal the gaps and it's good to go. So really, all I need to do now is solder everything together and then start assembly. The "glass" for the window is from a trimmed down plastic bottle and should give the effect I need.
I made a video of the first stages of the assembly and work, and that can be found here:
https://www.youtube.com/watch?v=vqs4Qs77Kig
Next up will be paint scheme and weathering.
The first thing I did was get the cockpit built and ready to install. Anyone who knows me knows that I have this thing for cockpits. I really like to look at a ride, whether it's a Viper, a figher, a 'Mech, a tank..whatever, and see that there is a cockpit, controls and possibly pilot. I think that all goes back to the first large-scale plane I built when I was younger, a 1/48 F-14. There's something about it that adds to the realism and believeability of the models. In this case, the MkII cockpit has forward windows rather than a canopy, so the detail can be a bit less than would be for that F-14, but still want it to look good.
I ended up just building a tub, and using photo-etched instrument panels. The pilot is a Catachan guardsman with a Cadian's head/helmet. Clanner helmets are smaller and more fitted than the I.S. Neurohelmets so that works for me. Heat, however, is still heat, and so the bare-armed and vest-wearing Catachan jungle fighter felt right for me. I put him in a fairly dynamic pose and then placed all the final details. Finally, lights. I really didn't have the materials to light up the instrument panels, but the way the cockpit is shaped and formed, the majority of everything is going to be in shadow and darkness. So, I decided that, hey, in for a penny in for a pound; let's light it up.
I mounted a pair of small yellow lights up in the uppper back corners of the cockpit tub, that will shine down on main part of the cockpit. They'll be powered by 3 small watch batteries. I needed to have a space where I could swap them out when they ran down, so that factored in to the what/where/how of placing them. That also cascaded a few more decisions on how to mount the hip to the body. I needed something I could remove, but would also be stable. I thought about magnetizing it, but that was just a bit too insecure for me. So, I just pinned it with some brass bar stock I have. Friction will hold it together just fine and also enable torso/hip twist. I then hollowed out the space for the battery compartment, and it'll sit just above the front part of the hip piece. The position of the space, combined with the hip in close proximity will hide the opening quite well, once everything is painted.
Cockpit from the outside..unlit
The cockpit before it was put in.
And the same, from the side.
I had a small slider switch on hand, and there is a very convenient space on the main body, behind the shoulder mount where it fit nicely. I hollowed out a hole for it to mount and drilled a channel for the wires to go. A little greenstuff to seal the gaps and it's good to go. So really, all I need to do now is solder everything together and then start assembly. The "glass" for the window is from a trimmed down plastic bottle and should give the effect I need.
I made a video of the first stages of the assembly and work, and that can be found here:
https://www.youtube.com/watch?v=vqs4Qs77Kig
Next up will be paint scheme and weathering.
Subscribe to:
Posts (Atom)