Saturday, January 30, 2016

Project R - Pt 4A

The last couple days have seen some better progress than recently.  I'm still struggling with the design parts for the cockpit, but the LRM launchers are finally formed and cast.  I'm happier with the way they came out than I thought I would be.  I was just going to go with a simple mating of the covers at one of the angles of the housing, but I really liked the "tooth" look of the drawing on MWO design, so I followed that, and pleasantly surprised myself.  The second image below shows one of the covers in place.  Clearly, I have a lot of cleanup to do in order to mate and finish the parts, but I'm liking it.

I plan to make missile inserts that will slide into the gaps of the launcher from 1mm sintra.. and that'll give the different LRM configurations (LRM20, LRM15, LRM10X2 and for the lower angle SRM6, SRM4 or 2 SSRM2.)


And this is a look at the pieces I've finished casting and have ready for cleanup and basic assembly.  Essentially, the arms, missile detail and torso parts are all that's left and then I can get into the fun of painting.


Friday, January 29, 2016

Project R - pt. 4

Over the last couple of weeks, I finished up the masters for the leg pieces.  I'm not 100% happy with all the details, specifically on the knee linkages.  I had thought to pick up some etched brass parts to add some interest to them, but I figure I can do that part during the actual build too.  So, I broke out the mold rubber and poured the rest of the leg pieces.  


I have the main leg assemblies in 4 parts, the foot, the shin and knee linkage, the lower and upper thigh.  The upper thigh is separate to allow for a twist to the stance.   The pours worked out to be fairly clean, and I only needed one re-pour due to bubbles for the lower thigh.  Note to self:  at some point, I really should look into de-gassing and pressure equipment.  Below are what the parts look like laid out and then stacked up.  I still have lots of cleanup to do, especially for the join between the two thigh parts, but I'm content with the main parts. 


I need to work out some aspects of the hip join, and the hip assembly, but that is work for another day. : )


Also, work progressed a bit on the Missile launcher housing.  This one is fairly plain, and it'll just have a couple of interesting armor plates on it to keep with the lines of the Archer.  Most of the detail is going to be in the under-housing heat dumps and the rear exhaust vents.  This one is also a two part cast, mostly so I have a place to pour.  The part needs detail all around the narrow edges, which is where I could pour from, and breaking this in two will let me detail those well without having to worry about seam lines and such. I'll just have to clean the mating point, like the thigh part.


I also got started a bit on the cockpit.  I drilled out the dials on the cockpit I'm going to use, and then poured a little bit of mold material into the space to use as a light diffuser.  It looks like it'll be fine.  I'll print out the dial details in color and overlay them along with the other instrumentation.


 That's it for now..

Friday, January 22, 2016

Project R - 3a

I got things cleaned up a bit and the leg looks more presentable.  I'll do the molding of the shin and thighs this weekend during Snowpockalypse.

I'm not entirely  happy with the detailing on the front of the thigh piece or on the knee linkage.  A wee bit more mechano-parts are in order there.  Once they're in place and cleaned up, I"ll mold those up.

Next up is the torso and hip.  I'm still fiddling with the designs on that one.  


Monday, January 18, 2016

Project R - Part 3

I had a chance to spend some time on the Archer today.  For the most part, I finished off the engineering of the leg and got the big parts shaped up.  

The knee joint allows for a bend and the upper part to the thigh allows a slight twist that will give the machine a bit of a chance to open it's stance.  I'm still on the fence a little about this part, as I could also do a ball/socket joint on it, but I think this is a cleaner build and more true to the the MWO look.  It also is simpler to cast up.    I have managed to keep the parts symmetrical so they'll cast up for both legs.   The way I sketched it out, the join to the hip will be an add-on part to the upper section and that can also be symmetrical and cast.  


I've also done the template for the shoulder and the main torso.  I had the shoulder launchers about to form up but then when I put them against the center torso, they looked a bit short.  So I stretched them a bit and redid the work on them.  Primarily with the center torso/cockpit, I'm wanting to rough out the main shape and then I think I might have to just drill into it after it's cast.  I'm still chewing on how to do that.  I want the cockpit built in to the form, but I'm having issues visualizing how to do the canopy cover.  More to chew on with that. 

In case you can't tell, yes, I'm intentionally trying to build this thing with a mind to casting the parts to make things easier to do.  In fact pretty much the whole thing is right/left symmetrical, so I should be able to just build one of each part, mold and cast them and be able to roll from there.  I can already see that this one has better detail and the parts are more along the lines of what I wanted out of them.  I really learned a great deal with the Hatchetman and those lessons are starting to show.

I still have a lot to do on these, but here's where we are so far.


Tuesday, January 12, 2016

Project R, pt 2

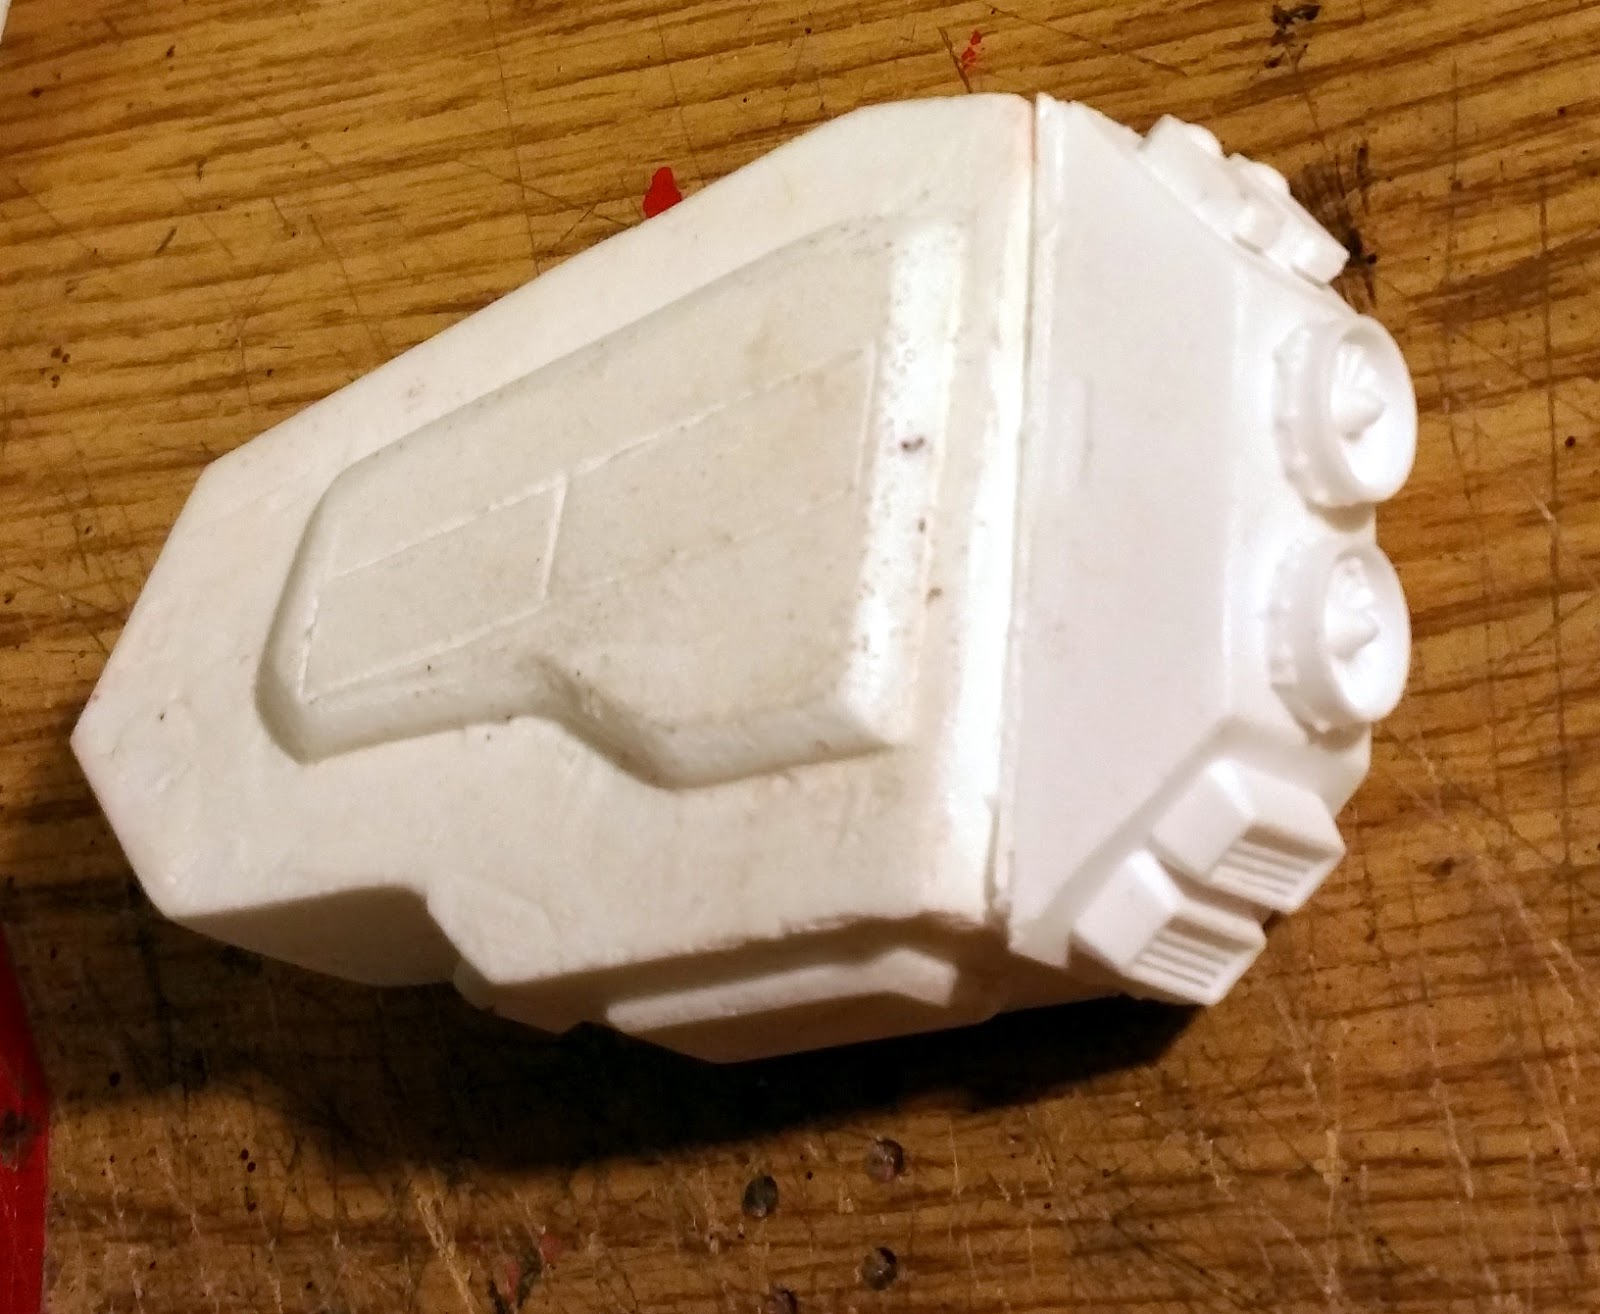
Development on the ARC-2w continues.  The foot piece has been completed, molded and the two production parts have been cast.  I ended up having to make a couple changes that I didn't quite want to, but I think they'll work out.  I wanted the upper shroud to be more of a plate rather than molded into the foot itself, but I think this works better for reproductions.  I'll add an additional shroud to the shin part to add interest and detail.

The base frame for the shin is shaped up, and is show in the below.  Next to do on it is build up the armor plates and detail, and then put in the knee joint.   Both the shin and thighs are planned to be symmetrical, just like the foot, so I can build one master then cast it twice.  The hip joint is still being processed in my engineering brain, but I'm likely to mirror the one that I planned for the Atlas.  The TRO design for the Archer has a round hip/lower torso master part, and I may imitate that with my build, depending on what I can find to use to master it out.


The other part that is giving me heartburn is the shoulder launchers.  In my specs, I want to keep the basic angular design, and again, they can be symmetrical, so a good master can be molded and cast to make both parts.  On the launcher there are two surface panels, one is long, arcing up the main torso and one smaller toward the front of the part.  Those will be the LRM20 and SRM4 respectively.  Ok, so that's not bad, but it's the designing of it that is making me sweat.  I expect to build up the torso much like Tim did the MadDog IV, with 3 pieces, one center and two symmetrical right and left.  The thing is, as I mentioned in my last update.. how.  The Classic Archer has a cover hatch that lifts up.  yeah, I can do that, and if I do, I'll do a cover hatch for the SRM-4 that drops forward and down.  Or, I can do covers like the MadDog IV, that have individual covers for each missile tube.


The bay cover will be more of a pain to model and build, but I really think it'd look cooler and be more true to the classic Archer lines.  I like the look of the arm design of the MWO build and I would like to probably follow something pretty close to that.  With that change, and some of the updates that follow the MWO look, I really think that I just need to take the time and effort to do the missile covers along the style of the TRO look.

Another thing I need to consider is how I want to do the cockpit.  I do *not* like the look of where the cockpit is located on the MWO build.  I think for that I'd like to build the cockpit into the forward slope of the center torso or do a semi-bubble cockpit like the MadDog's. Either one should give an opportunity to build out a nicely detailed cockpit.

Anyway, that's where the development for the ARC-2W is at this point.

Tuesday, January 5, 2016

Production gears up: Project-R

It doesn't look like much.  Then again, at the first-steps stages, not much looks like much at all.    I am working from the graphics for the MWO version of the Archer, and I expect that I'll keep fairly close to that in a lot of ways.  There are some very distinctive lines to the Archer, and those I have to keep.  I like the look of the arms on the MWO design.  Truth be told, there are a lot of the designs from MWO that I prefer over the TRO drawings.  I suspect that part of it comes from the dynamics of the online game vs the creativity of just drawing pictures. 

I guess the engineer brain in me just balks at many of the TRO drawings.  They just look "wrong."   The Hatchetman, for instance.  The legs are just too spindly for a machine designed for combat to begin with, and even moreso as the H is supposed to close into melee.  The standard expectation for a Battlemech in melee is the kick, and considering the damage done through a kick, that would be one of the more heavily armored locations. I get that is one of the design flaws, but there is 'not armored enough' and then there is 'are you kidding me, how do those work at all?'.    I intentionally added a bit of beefier armor to the mech I built, and overall, it still had a spindly look compared to the heavier mechs.  It makes sense, with the Hatcheman being a 50 ton vs the Victor's 70. 

In MWO, the designers appear to take physics and machine dynamics into consideration as they design.  I think they underestimate the size of the small mechs, but the mediums and up seem to fit close to my mind.   Mixing the MWO looks with TRO classic stylings is a nice middle ground for a traditionalist like me.

The Archer is going to follow many of the stylings of the MWO look, because it does keep those distinctive lines intact.  I plan to do the -2W variant with LRM-20s and SRM-4 launchers.   As I think of the design, I'm looking at a design that puts 2 launcher covers on the shoulders.. The traditional long covers that lift up to reveal the LRM-20s, and on the front angle, a smaller box-like cover that drops down to reveal the SRM-4's.  Again, from a design standpoint, large covers are kinda silly, so I have to think if I'd prefer to do Mad-Dog-like hatches that cover each tube individually.   That would be logical from an engineer's perspective, but from the "it looks like the Archer" perspective, it diverts from tradition.  

I have time, I'm only on the foot.   You know, I realized just now that I always start with the foot.  I did the same with the HCT and the same with the Atlas I designed.  I start with the size of the foot and build up from there.   Am I the only one that does that? 

So, looking at the development, I'm thinking how to do this.  Once I have the foot designed and finished, I'll do the shin then thigh.  For consistency, I'm planning to make them symmetrical, so I can just cast foot/shin/thigh parts so I don't have to build them to match precisely.  : )


Anyway.. We're off.