As in..Maddog. Mk IV, that is.
The link to the unboxing of awsomeness.
I have more work in the pipeline. Yaay!
Sunday, July 19, 2015

Thursday, June 25, 2015
Tooling up.
It. Is. Here.
Project “V” has
arrived in the receiving department and is moving to the assembly line. This is to reinforce the deployment for
He-who-must-not-be-named, but it's a surprise.
HWMNBN isn't a follower of this blog, so if any of yawl know him, shhhhhh.
:) This one won't be quick, as
there is a ton of work to do on it. Or
rather, 80 tons of work.
The base kit is
amazing. I video'd the actual opening
and first-look, and you can see this machine at the link here:.
HWMNBN is used to a
standard loadout of AC20, twin ML's and
SRM4. With the maneuverability of
jumpjets and the massive punch of the AC20, it's a brawler's dream, being able
to use cover to close the distance and then emerging to open up with a massive
fusillade for an Alpha strike.
He is partial to the
paintscheme he had when he ran with the Merc company; one that is black with
red highlights. Black is always a bit of
a challenge to get right on scale, and it also means that the weathering techniques
have to be more in the reverse from normal.
Instead of darkening up shadows and pits, it'll be the highlights of
caked on mud, and flaked paint showing the bare metal and rust underneath
that'll be needed. The trick with all
of it is coming up with the paint scheme ahead of time, and making it work with
the weathering and damage techniques.
The major work is
going to be the cockpit. HWMNBN needs
an appropriate pilot and internal cockpit build, and I have recently gotten my
paws on a set of decent 1mm lights. The
angle of the screen and the shrouds
around the head limit what you're going to be able to view, so the real work is
going to be on the pilot himself and the back of the cockpit. Instrumentation and controls will have to be
limited to what can be seen on the side.
The Maddog and the Timberwolf
both have "above" and
"behind" windows that allow the main instrumentation to be seen, but
the Victor just doesn't. Neither does
the Warhammer and norr will the Steiner Recon Mech when it arrives. So the trick here is to merge the
"interesting aesthetic" with the "that's a reasonable and
expected place for switches/knobs/dials…" look. The millennium falcon has lights and
switches all along the back of the cockpit.
None of them are reachable during the frenetic activity of flight or
fight, but they are reasonable pre-flight systems controls or usable by a flight
engineer. Battlemechs are mostly
single-pilot and the controls need to be ergonomic and forward.
Now, as to the
"how".. I can see there will be a lot of grinding in my future. I'll need to hollow out the torso and head,
and then build the cockpit and support electronics into it. I'm wondering if I want to put lights in the
jump jets, but that may not. I'll
definitely hollow out the SRM tubes and put in missile tips. At first blush, I think the best way to
build the cockpit will be to just create a tub that sits under the head, and
attached to the head so it will track as the head is rotated.
Oh.. Just had a
thought, and I hate myself for it: I
could light the ML's too. These leds are
small enough that they could go behind a lens.. Ok, that might be overkill.
So, back to the
cockpit. Another option I could do
would be to make an access hatch.. That'd open up the build to more viewing,
and will rely on heavily modifying the
head. I'll let that bounce around my
head.
Right now, I have my
Timberwolf built to be staged for battle.
I could take it out and play battletech on the tables down at
Legions. I'm contemplating making a
diorama for the Victor. If so, what
kind? Battle? Refit?
Repair? Battle-aftermath? All of the above? Any of the above? .. Decisions..decisions.. At the very least, I should make an
appropriately-sized Hex base to deliver it with…
Of course.. Now *I*
want one too. (But I still need to get
through the JR7-D, the WHM-6R, the AS7-FCY , AS7-DDC and the MkIV Mad Dog.
)
Thursday, June 11, 2015
updatedness updates
So here we go. There is some bench movement, of a sort.
First, I did a couple of unboxing videos. I have two subjects on my to do shelf that I'm starting to cleanup in prep for actual work. The first is the BadAzz Raptor from BSG.
The unboxing for that is here
To clarify any possible confusion, I really like this kit. I have always like the concept of the raptor in BSG and thought the whole UH-1 concept craft helped give that whole atmosphere a more realistic military feel. The Raptor has a good utilitarian sense to it and this model is a very nice version of it.
Of course, I plan to light this one. I need to figure out where and how, but yeah.. This isn't going to be a quick and easy project. But I'm ok with that.. Why should they be?
The second unboxing is the Jenner, from Thor's Mechworks. The unboxing vid is here.
Like most printed items, it has the raised ridges on the surface, but they're really not all that bad. I've played around a bit with some putty options and it looks like that'll address most of those issues. I love my SSRM-packin' Jenner in MWO.
This one..the cockpit will be .. Uhm.. Cramped? :) I am unsure at this point how I'm going to handle this. I think what I may end up doing is prepping a copy of the main body, so if I screw up cutting into this one, I can just do a solid re-paint. However, the scale is very tight for a 1/60 cockpit. I may end up having to pull a 1/72 tub to base off of. I want to make sure I keep it in line with the TimberWolf, and the others I have in the pipeline.
… more to come.
First, I did a couple of unboxing videos. I have two subjects on my to do shelf that I'm starting to cleanup in prep for actual work. The first is the BadAzz Raptor from BSG.
The unboxing for that is here
To clarify any possible confusion, I really like this kit. I have always like the concept of the raptor in BSG and thought the whole UH-1 concept craft helped give that whole atmosphere a more realistic military feel. The Raptor has a good utilitarian sense to it and this model is a very nice version of it.
Of course, I plan to light this one. I need to figure out where and how, but yeah.. This isn't going to be a quick and easy project. But I'm ok with that.. Why should they be?
The second unboxing is the Jenner, from Thor's Mechworks. The unboxing vid is here.
Like most printed items, it has the raised ridges on the surface, but they're really not all that bad. I've played around a bit with some putty options and it looks like that'll address most of those issues. I love my SSRM-packin' Jenner in MWO.
This one..the cockpit will be .. Uhm.. Cramped? :) I am unsure at this point how I'm going to handle this. I think what I may end up doing is prepping a copy of the main body, so if I screw up cutting into this one, I can just do a solid re-paint. However, the scale is very tight for a 1/60 cockpit. I may end up having to pull a 1/72 tub to base off of. I want to make sure I keep it in line with the TimberWolf, and the others I have in the pipeline.
… more to come.
Wednesday, April 29, 2015
Yep, the bench updates have been quiet. In truth, the bench really has been in more
flux over the last 6 months than it’s been in years. As it happens, the workbench was moved about
three times over that timeframe, as I searched to both a) find a synergistic
construction environment that best suited my needs and b) adapted to the ‘new
normal’ that is my external life. I
believe that I am finally winding down that part and getting back to the “builds”
part of having fun. With all that said, I do have some updates.
1)
Malekith and Seraphon are nearly done. The modeling part has been completed, now it’s all about the painting. Pics
to come.
2)
I have a package from Thor’s mechworks that needs
to be opened. I need to set up a filming space in the new
environment and then do the un-boxing.
This will enter the construction pipeline as Project J.
3)
Package from FCY is also incoming when his
manufacturer completes the run. That
will enter the pipeline and take priority, Designated Project MD.
4)
So.. Atlas is on hold, partially because I’ve
been working on figuring out the details.
Then I see that the Awesome Mr. Fusco has hooked up with the Steiner Scout
Lance supply Line, a.k.a. Scott over at Messy Desk.. and Scott’s Atlas will be
kitted out. Yes, that will be ordered
when the time comes. I still want to finish my custom work, but now
I’m not going to worry about even attempting to kit it. I still figure it’ll pale by comparison, but
I will be happy to have done it. Pipeline Projects A and AFCY.
5)
Package from Jt-Graphix is also incoming and
will enter the pipeline under designation Project R.
So.. it’s not much, and doesn’t seem to do justice to the
amount of time I’ve been fiddling on the desk.
But, there you have it.
Friday, February 6, 2015
More Seraphon
So. Now to the real work. I have a pretty good idea of the paint scheme I want for Seraphon. But there's something that twitched when I first saw this. I love the look of the 4 eyes and the very dynamic face. I asked "he who shall be unnamed" about how to paint a glowy effect, and his offhand comment prompted that I try something crazy.
So, I decided to light the eyes.


Those test casts provided some opportunities to figure out how to drill the resin "production" head and open up the eyeslots. This is a look at how they finally look, with a dime in there for
comparison.


I also hollowed out the throat and want to give it a "glow from down deep" rather like the Balrog from Lord of the Rings. This, to me, is what a DRAGON is...I picked up some 1mm led's and will be powering them by 2 LR44 batteries concealed in the base. I put the switch for it all into a treasure chest that has a hinge put on it.


I do need to also do some more work on the body of the dragon. The forgeworld pieces are all well-textured and the pieces that are from the black dragon body are all smooth plastic. So, what needs to happen is have layers of greenstuff put on and those smooth areas filled out and buffed up to match the texture. Along with that, there are some hotspots where the lights glow through the plastic or resin, and a layer or two of greenstuff is needed there as well. Of course, this resin is a bit fragile, and there are several horns that have broken off and at least two of the claws need to be fixed as well.
So, I decided to light the eyes.
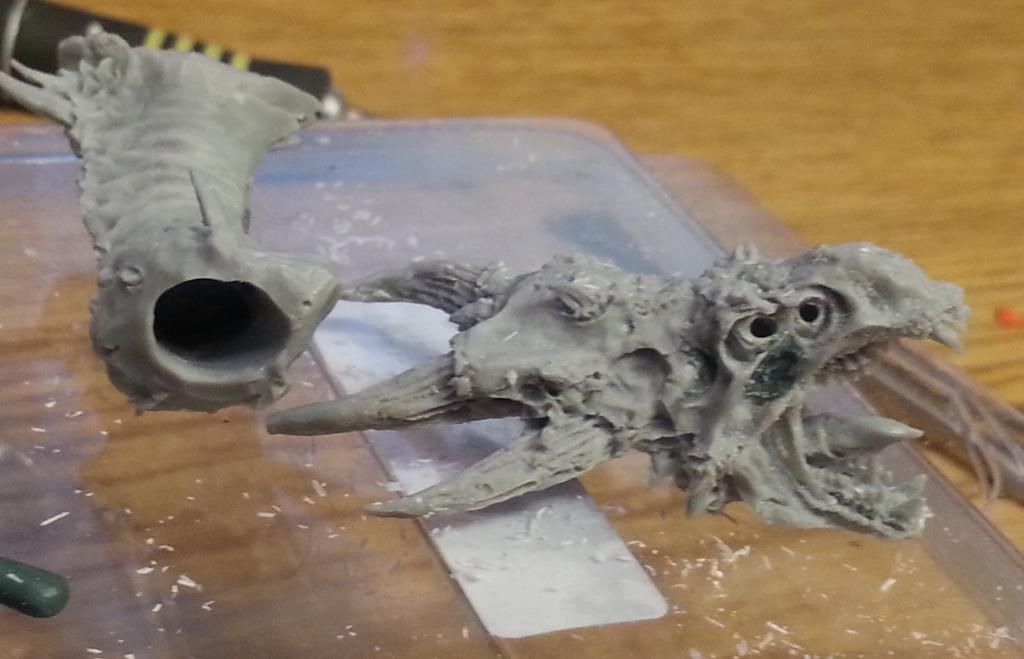
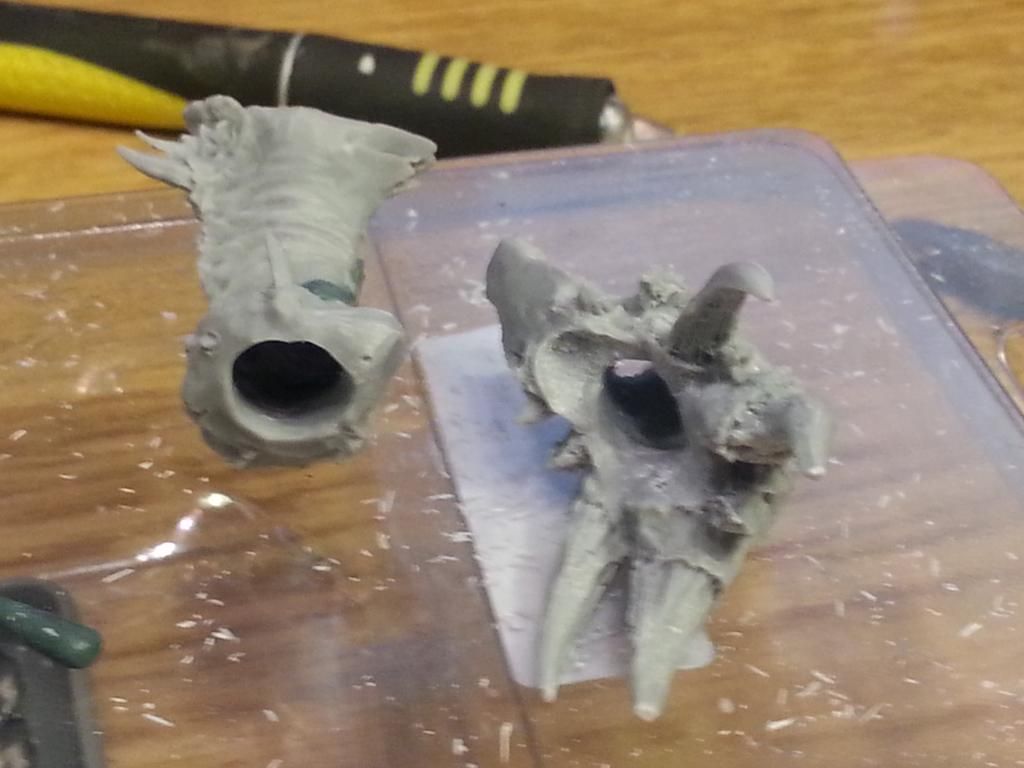
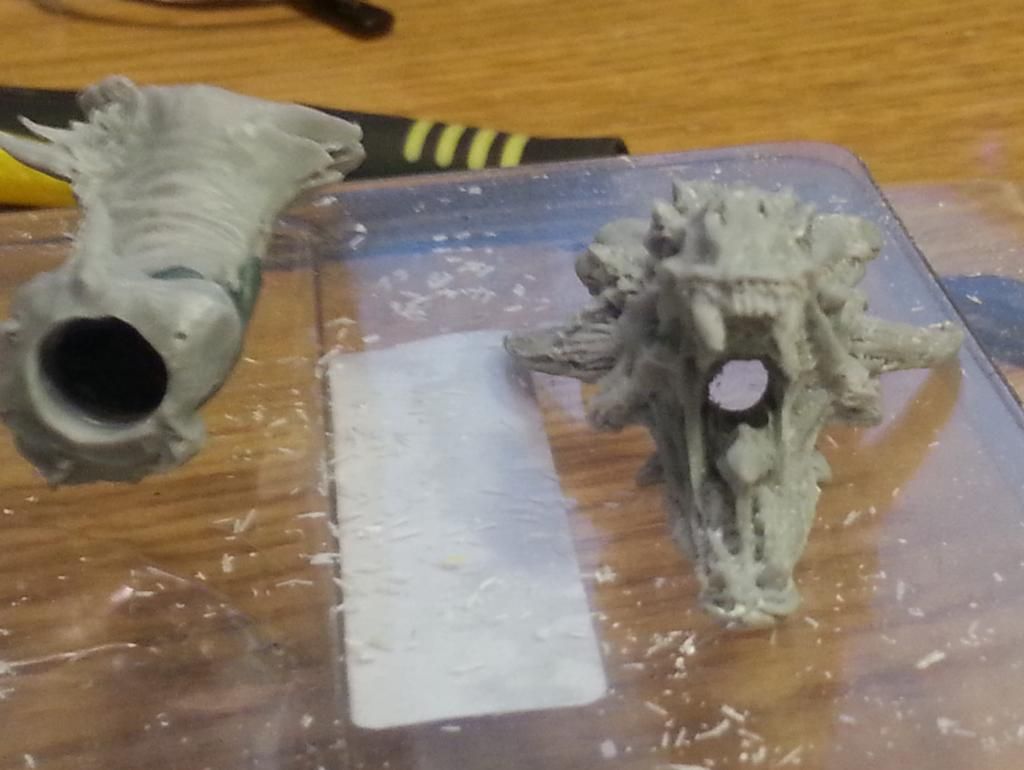
Those test casts provided some opportunities to figure out how to drill the resin "production" head and open up the eyeslots. This is a look at how they finally look, with a dime in there for
comparison.

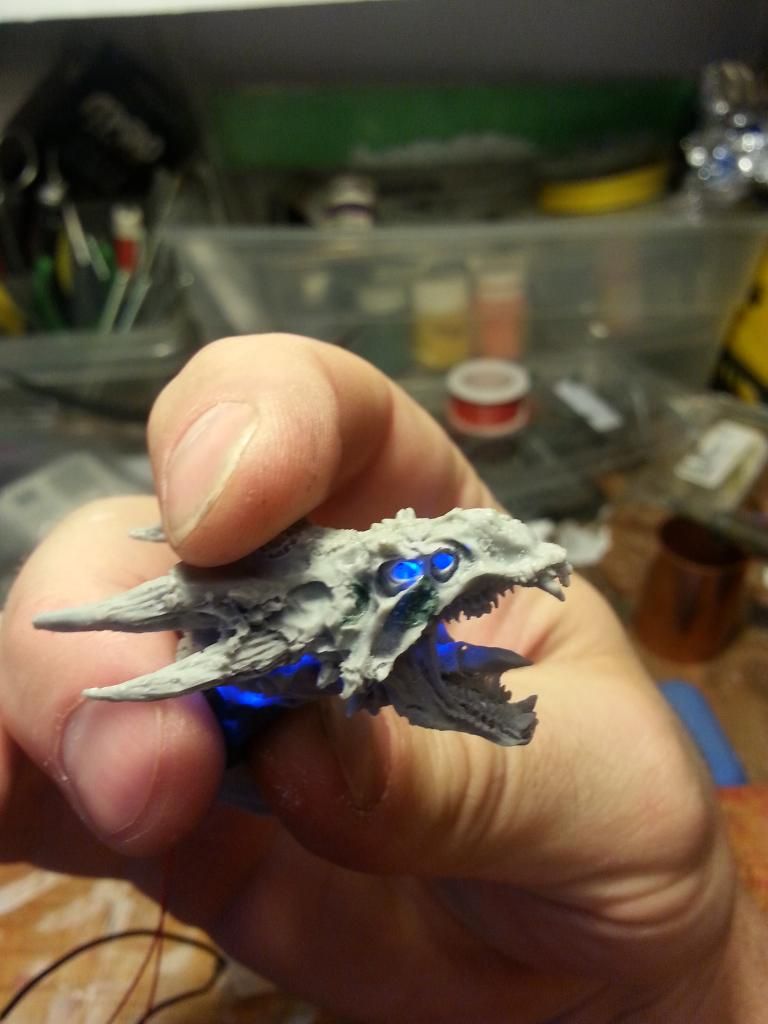
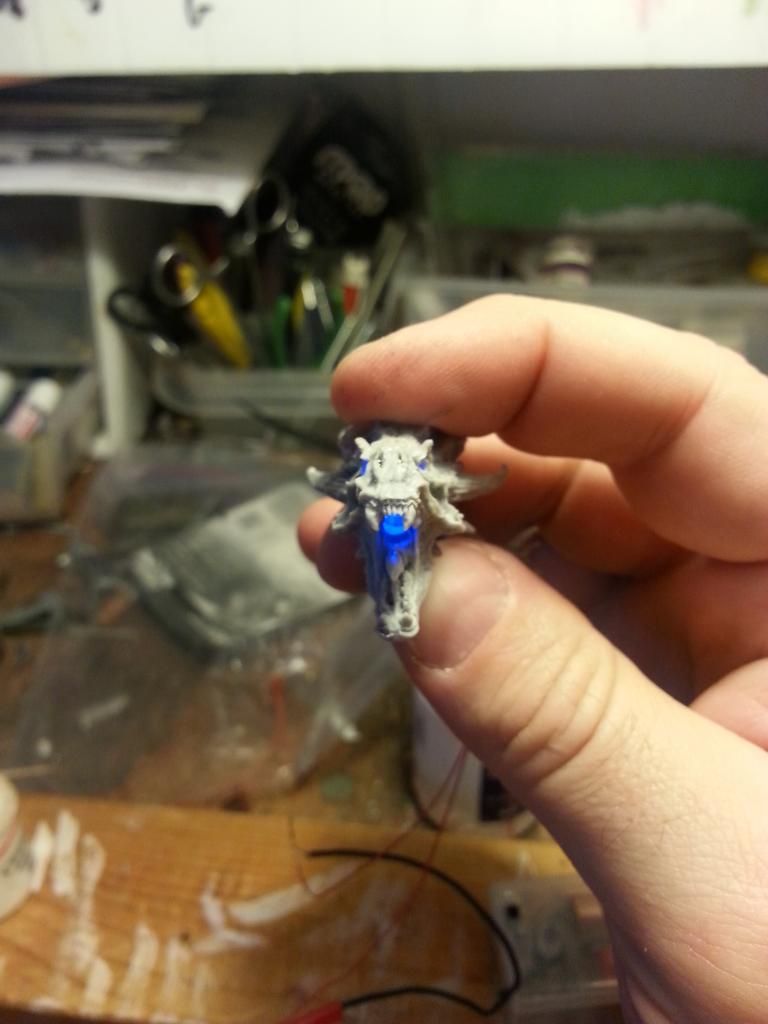
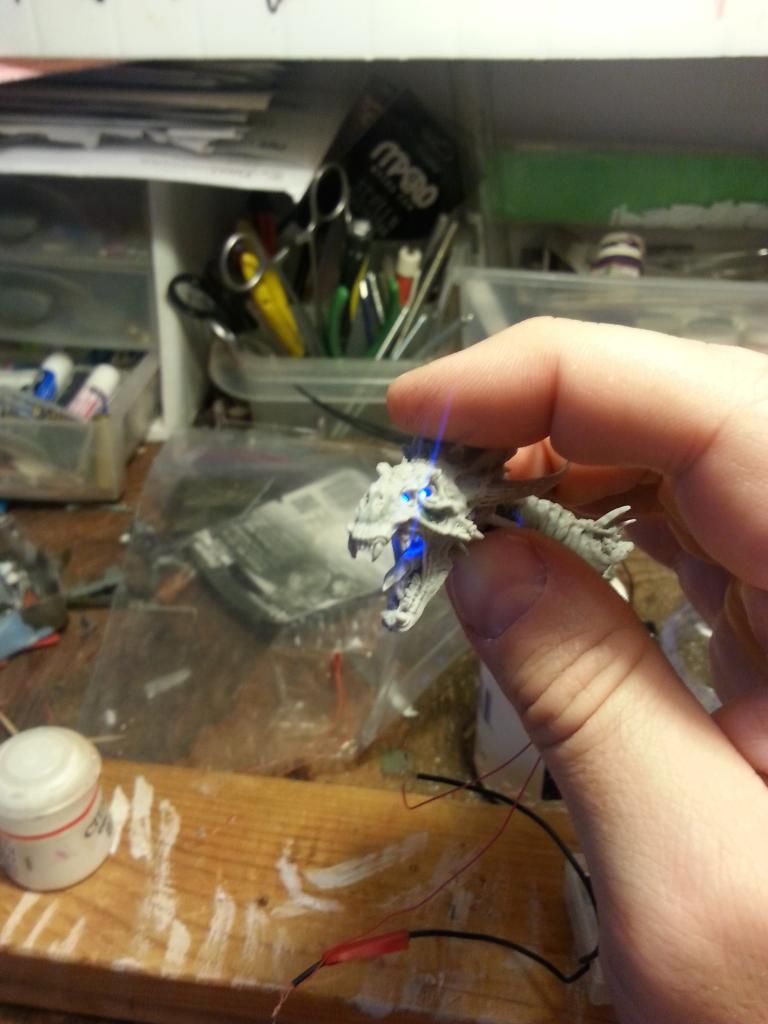
I also hollowed out the throat and want to give it a "glow from down deep" rather like the Balrog from Lord of the Rings. This, to me, is what a DRAGON is...I picked up some 1mm led's and will be powering them by 2 LR44 batteries concealed in the base. I put the switch for it all into a treasure chest that has a hinge put on it.
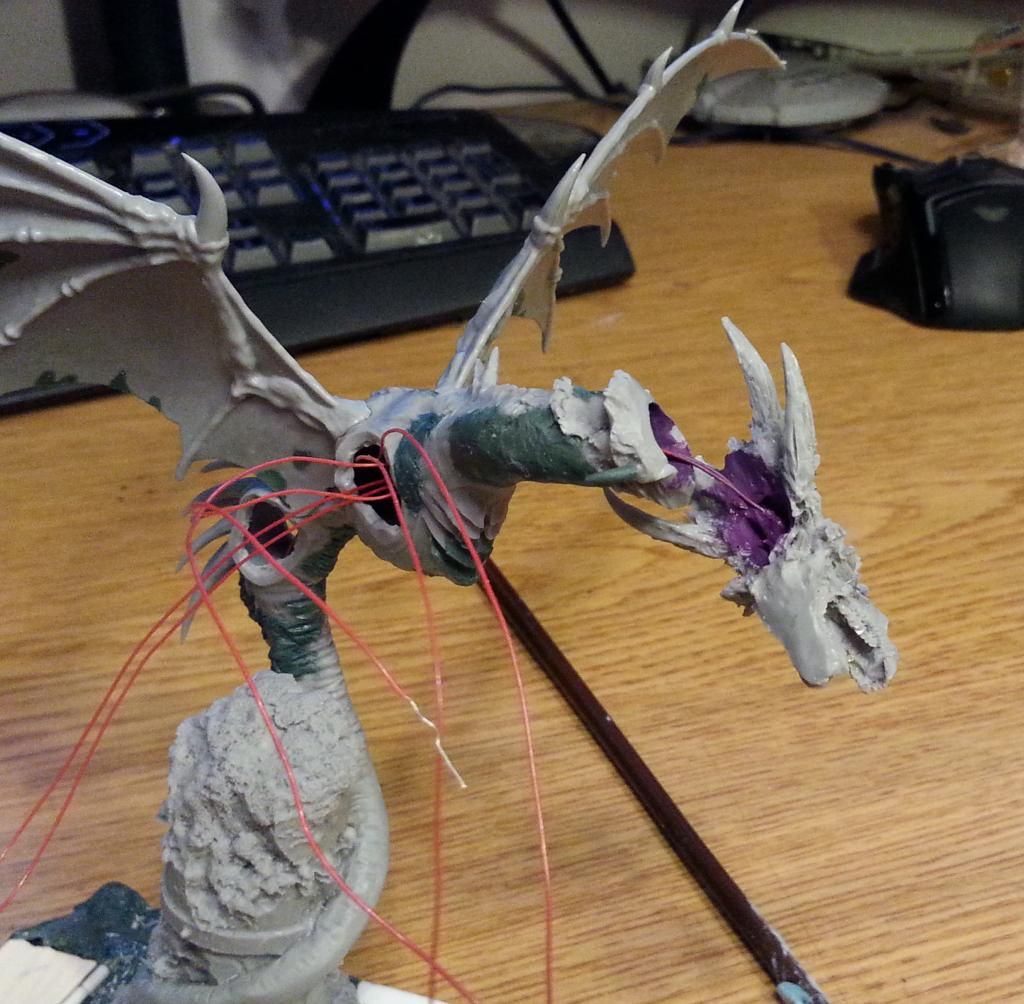
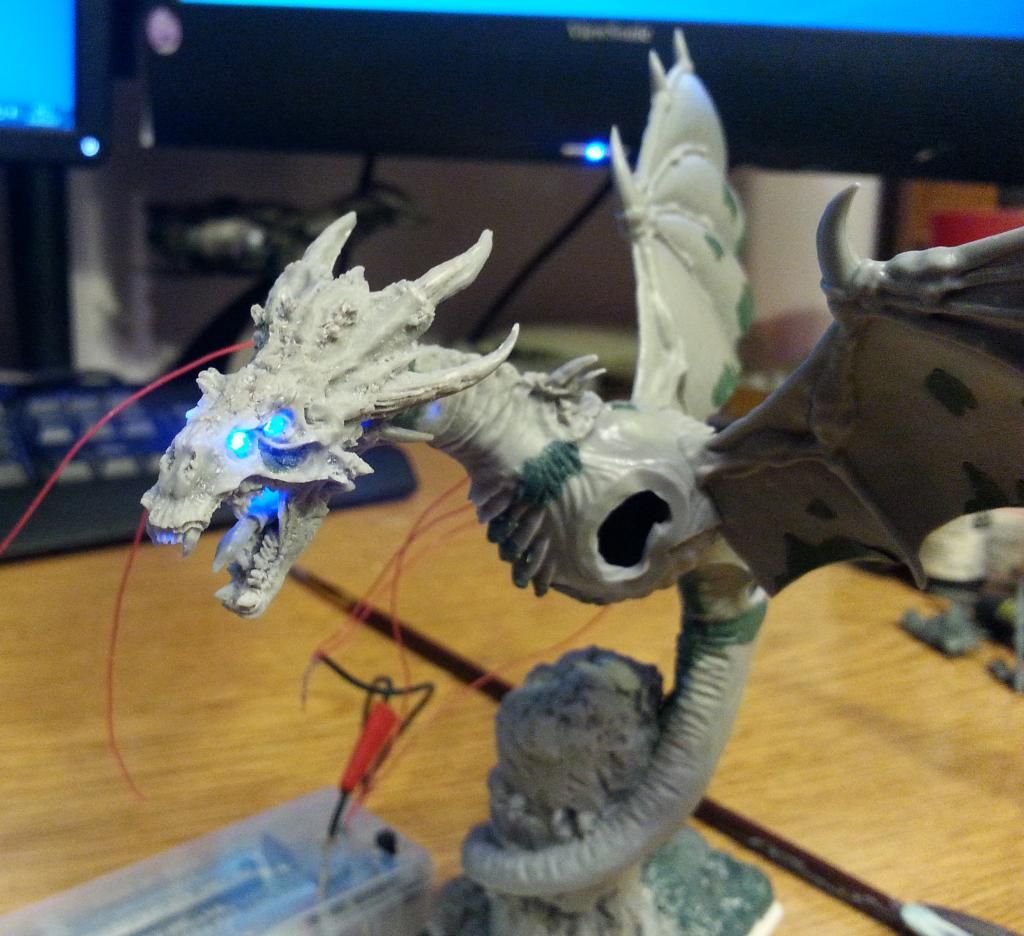
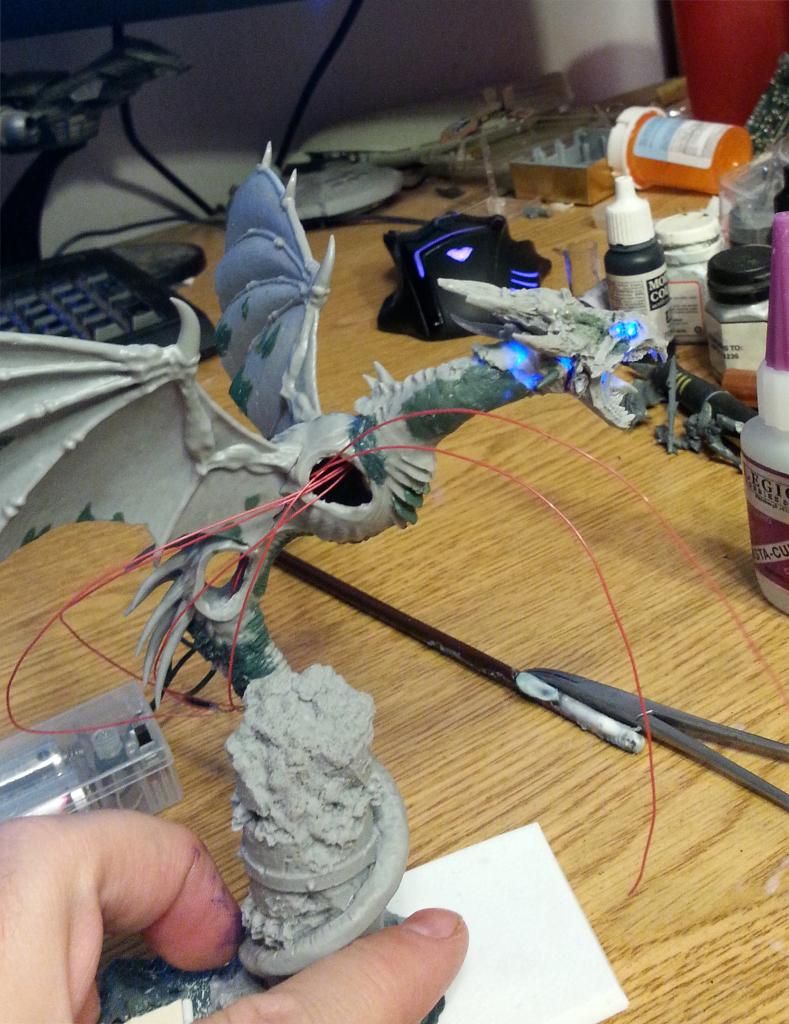
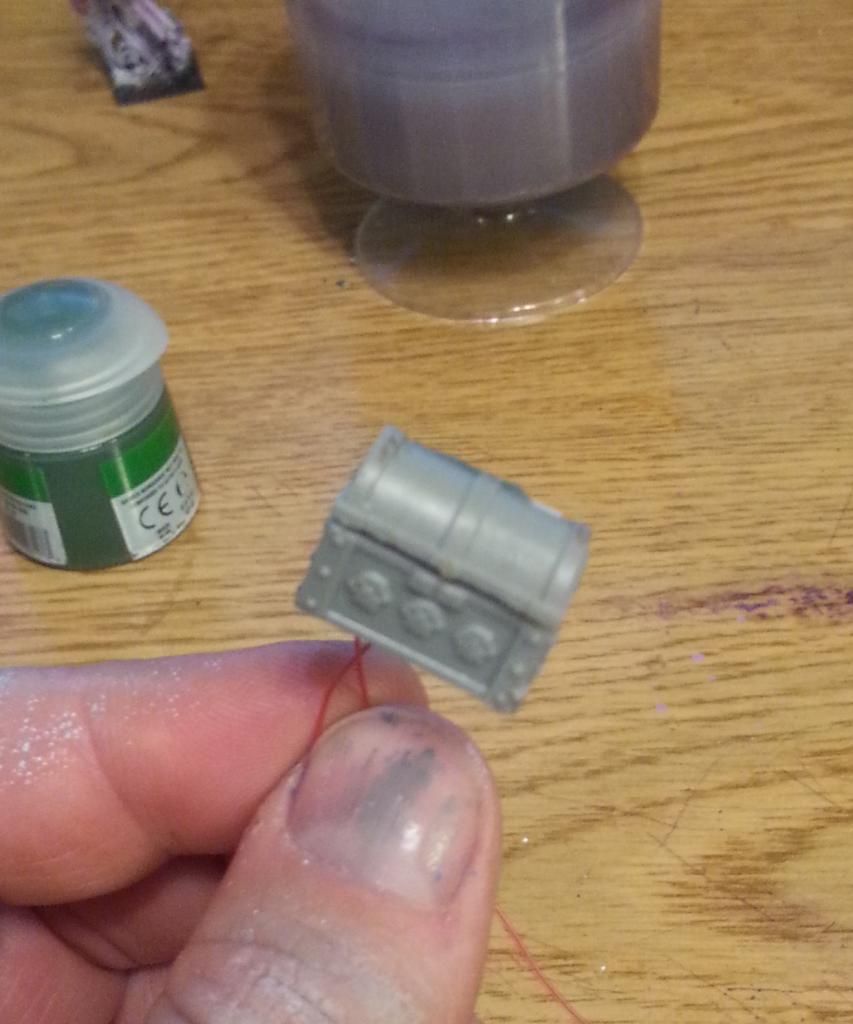
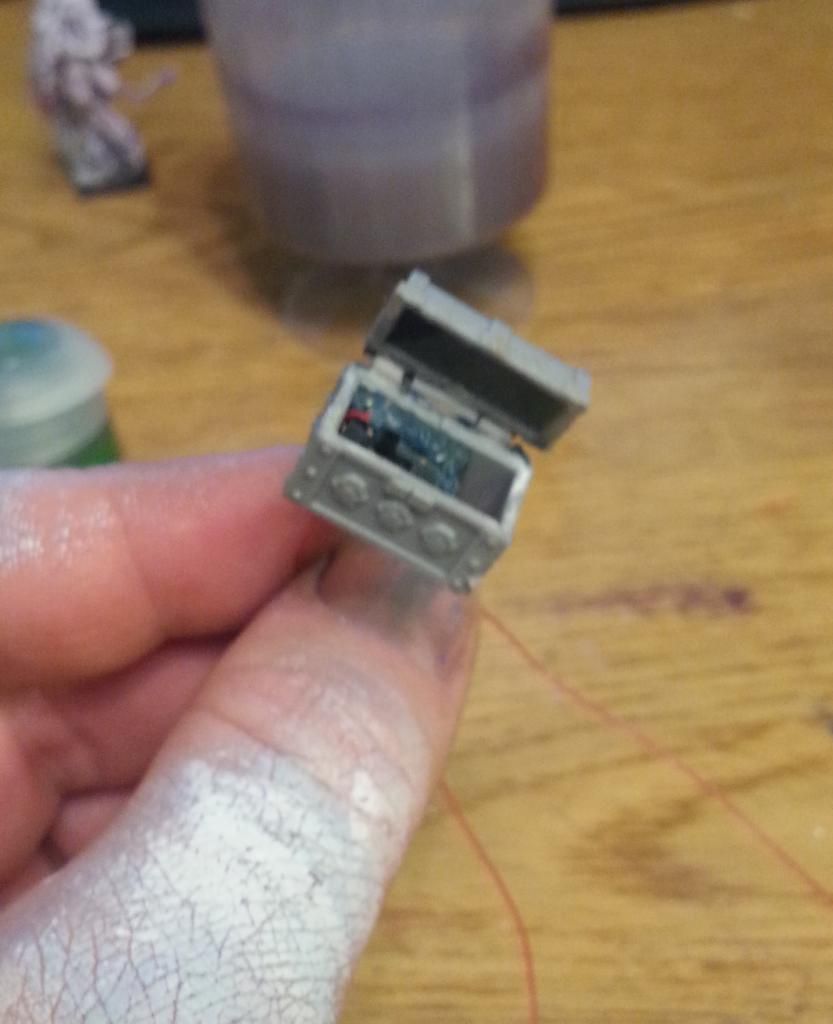
I do need to also do some more work on the body of the dragon. The forgeworld pieces are all well-textured and the pieces that are from the black dragon body are all smooth plastic. So, what needs to happen is have layers of greenstuff put on and those smooth areas filled out and buffed up to match the texture. Along with that, there are some hotspots where the lights glow through the plastic or resin, and a layer or two of greenstuff is needed there as well. Of course, this resin is a bit fragile, and there are several horns that have broken off and at least two of the claws need to be fixed as well.
Tuesday, January 27, 2015
Somewhat productive week.
So. Getting there.
The Eagle Rider is done, or as done as I am going to be able to make it. I ended up ripping off the one I did before and redoing it totally from scratch. This one has come out a bit better. There are still bubbles, and that's going to be my bane until I can get a vacuum chamber. However, these were much smaller and are likely to disappear once the owner starts painting it. I can barely make them out with my eyes, although when I zoom in to take the pics, they show up fairly well.


The sculpting was ok. I still don't like the cape, but I suspect that I could work that over and over and over and I'll never be happy with that. I'm getting a handle on the flow of cloth in wind. I'll do a bit more when I do Malekith as well, and also when I work on the mounted Witch Hunter. On the other hand, all four horns were pure sculpts, because all the horns didn't fill in the mold, I figure I need to learn how to make vent holes. But the horns were easy enough to hand sculpt and attach. I am looking forward to seeing how this will look when AngryHippy gets done painting it.
Speaking of painting, I ran several more tests of colors and techniques on the head of the Dragon. I have three raw casts of it so I can see how the colors come out. Another trick that I need to keep in mind is that some of the parts are smooth, since they're the plastic pieces from the Dragonlord model, and the pieces for the Warpfire Dragon are more raw and textured. I haven't figured entirely how I'm going to handle that, but I suspect that there'll be some liquid greenstuff and putty greenstuff to build up textures on those smoother surfaces.
I finally got a wash/base get me what I wanted. It's a Black Grey undercoat with a Black Wash and drybrush of Royal purple (Vallejo Model Color Black Grey, Gloss Black and Royal Purple) The next thing I needed to do was figure out how the horns are going to look. I hate the "all one color" look of a horn and prefer a transitionary color. I tried a lot, from black to purple to purple black to gray, to bone to purplish bone, etc. You'll see several different styles in the pics below.


With that done, it's time to figure out what color transitions I like. I think the one that works best for me is the the black-to-purple-to-bone transition. I like the fade and hint of purple as it goes darker. Of course, that's probably the most complicated of the paintschemes, but hey, would I be "me" if I chose otherwise? The thing is, I'm going to have to do this to *all* the horns.. and this guy has a lot of them. Wheeeee. Good thing I'm not in a hurry or anything.
The Eagle Rider is done, or as done as I am going to be able to make it. I ended up ripping off the one I did before and redoing it totally from scratch. This one has come out a bit better. There are still bubbles, and that's going to be my bane until I can get a vacuum chamber. However, these were much smaller and are likely to disappear once the owner starts painting it. I can barely make them out with my eyes, although when I zoom in to take the pics, they show up fairly well.
The sculpting was ok. I still don't like the cape, but I suspect that I could work that over and over and over and I'll never be happy with that. I'm getting a handle on the flow of cloth in wind. I'll do a bit more when I do Malekith as well, and also when I work on the mounted Witch Hunter. On the other hand, all four horns were pure sculpts, because all the horns didn't fill in the mold, I figure I need to learn how to make vent holes. But the horns were easy enough to hand sculpt and attach. I am looking forward to seeing how this will look when AngryHippy gets done painting it.
Speaking of painting, I ran several more tests of colors and techniques on the head of the Dragon. I have three raw casts of it so I can see how the colors come out. Another trick that I need to keep in mind is that some of the parts are smooth, since they're the plastic pieces from the Dragonlord model, and the pieces for the Warpfire Dragon are more raw and textured. I haven't figured entirely how I'm going to handle that, but I suspect that there'll be some liquid greenstuff and putty greenstuff to build up textures on those smoother surfaces.
I finally got a wash/base get me what I wanted. It's a Black Grey undercoat with a Black Wash and drybrush of Royal purple (Vallejo Model Color Black Grey, Gloss Black and Royal Purple) The next thing I needed to do was figure out how the horns are going to look. I hate the "all one color" look of a horn and prefer a transitionary color. I tried a lot, from black to purple to purple black to gray, to bone to purplish bone, etc. You'll see several different styles in the pics below.
With that done, it's time to figure out what color transitions I like. I think the one that works best for me is the the black-to-purple-to-bone transition. I like the fade and hint of purple as it goes darker. Of course, that's probably the most complicated of the paintschemes, but hey, would I be "me" if I chose otherwise? The thing is, I'm going to have to do this to *all* the horns.. and this guy has a lot of them. Wheeeee. Good thing I'm not in a hurry or anything.
Tuesday, January 20, 2015
moving forward.
So. The only progress I've been able to make has been on the Eagle Rider and The Eternity King's ride. The EagleRider has airbubble issues. This is annoying. I've tried liquid greenstuff, and will keep trying more, but it is beginning to irritate me. I am wondering if I'm working with the stuff wrong, but it doesn't appear so based on the things I've seen out there on the interwubz. I'll post up pics when I've delivered to the customer.
As a side note, if this stuff works the way it has been, it might just be the solution to the WHM-1r and the Jenner. It's easier to use than the body putty I've been using for the DDC.
The next thing is the Dragon. I am wanting a BLACK dragon, but with a hint of amethyst throughout. Getting a "hint" of any color out of black is always a challenge. I have tried a few washing and drybrushing techniques and the results have been mediocre.
Below are the results of two tests.


I prefer the darker of the two which used several layers of a royal-purple and black wash, with a bare drybrush of light amethyst. It still has a much more "dry stone" rather than "bare bone" look, which is not what I was after. I really would like to find a way to come up with a blackish-bone look that feels better on it. Perhaps a different highlight. Then I'll have to find a way to do a similar thing with the wings. Black "leather" vs black "bone."
And then, there's Malekith, the Eternity King himself. That is going to be a custom build because there really isn't an option there.
As a side note, if this stuff works the way it has been, it might just be the solution to the WHM-1r and the Jenner. It's easier to use than the body putty I've been using for the DDC.
The next thing is the Dragon. I am wanting a BLACK dragon, but with a hint of amethyst throughout. Getting a "hint" of any color out of black is always a challenge. I have tried a few washing and drybrushing techniques and the results have been mediocre.
Below are the results of two tests.
I prefer the darker of the two which used several layers of a royal-purple and black wash, with a bare drybrush of light amethyst. It still has a much more "dry stone" rather than "bare bone" look, which is not what I was after. I really would like to find a way to come up with a blackish-bone look that feels better on it. Perhaps a different highlight. Then I'll have to find a way to do a similar thing with the wings. Black "leather" vs black "bone."
And then, there's Malekith, the Eternity King himself. That is going to be a custom build because there really isn't an option there.
Subscribe to:
Posts (Atom)